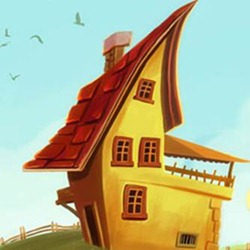
With this tutorial, I am going to explain the process of painting which I have called, "The Imaginary House". I will go into detail and show my working process and what tools I prefer to use. When you finish this tutorial, you'll gain a comprehensive understanding of how to develop a concept sketch.
Preview of Final Results

“The Imaginary House” Painting Photoshop Tutorial
Step 1
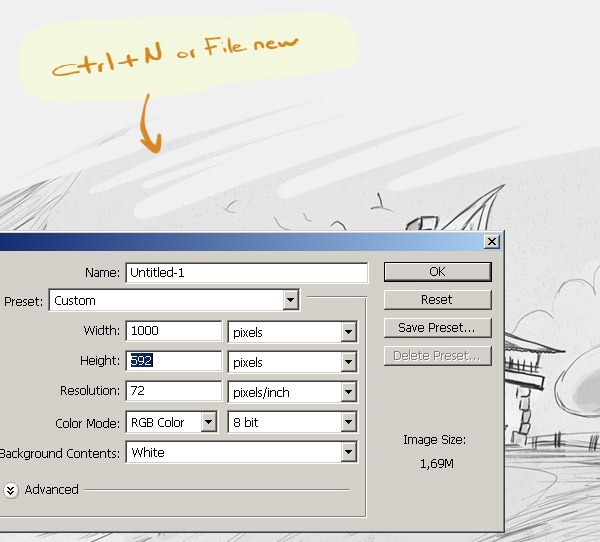
First of all, Let's open a new document (approximately 700wide and 826 high, around 72 dpi) and make a preliminary sketch. (Ctrl+N or File > New). For now it is in 72dpi, but after changing the resolution to 300dpi (without re-sampling image) you can able to print it on A3 format in pretty good quality- Width: 1000px
- Height: 592px
- Resolution: 72.
- Color Mode: RGB Color; 8 bit
- Background Contents: White
Step 2
The hardest part with any environment or character illustration is coming up with the idea. I started sketching some ideas and quickly come up with this environment scene. Depending on the complexity of the task I am doing, I'll make a number of different sketches. Now, here is the main sketch work which I draw.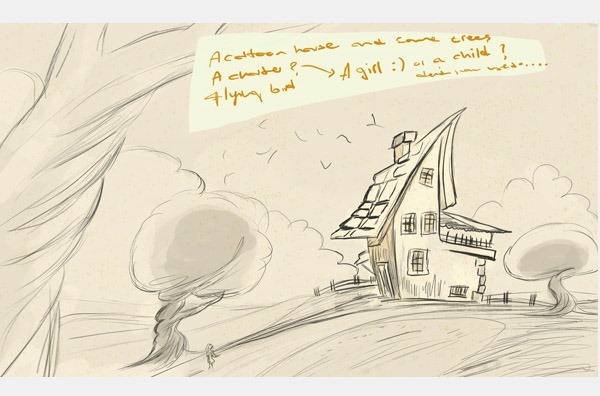
Step 3
After finishing the the sketch, I set the sketch layer to "multiply. To open the Layers Palette if it isn't already on your screen, press the F7 key at the top of your keyboard. Or you can open from Window/Layers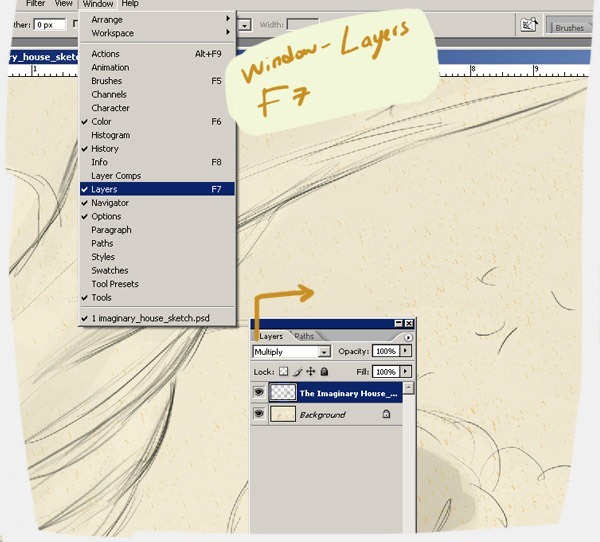
Step 4
Now to create a new layer, press Shift+Ctrl+N (Win) / Shift+Command+N (
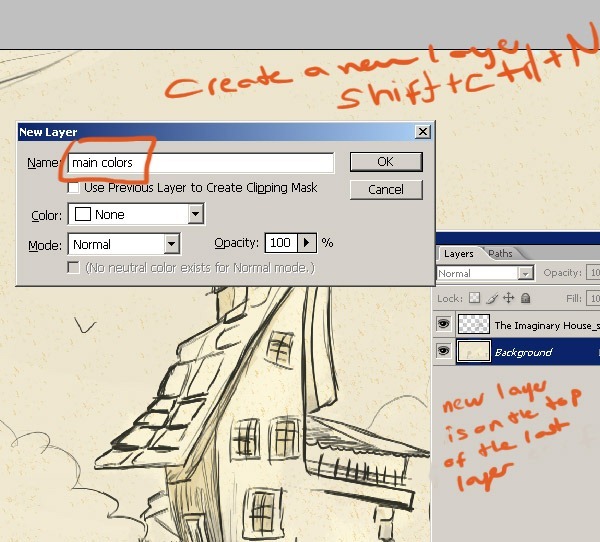
Step 5
Open a new layer and make a selection with a Rectangular Marquee Tool (M) and after selecting the canvas choose the Paint Bucket Tool (G) fill the new layer with this new color. Now I must deselect the selected area. For this click on the Select and choose Deselect (Ctrl+D) option.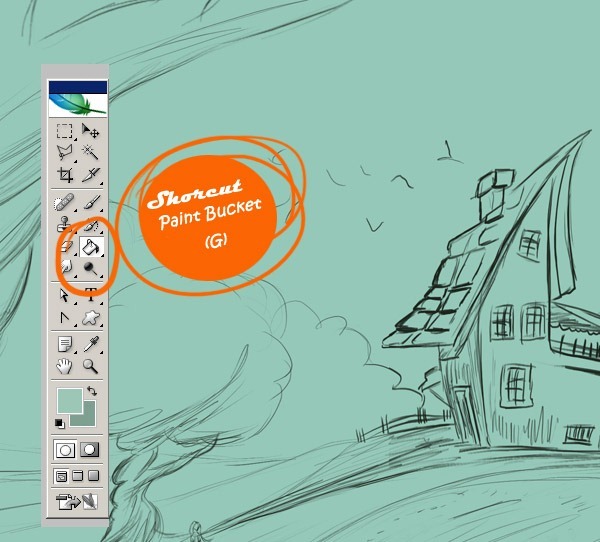
Step 6
The second step is here you to choose the main colors for you scene. And here are my colors for this illustration. As always I want to do something really colorful painting. I decided for background some blue colors and a little yellow . Other colors are for the environment. Open another file and save your colors. And always keep open that new file when you are painting.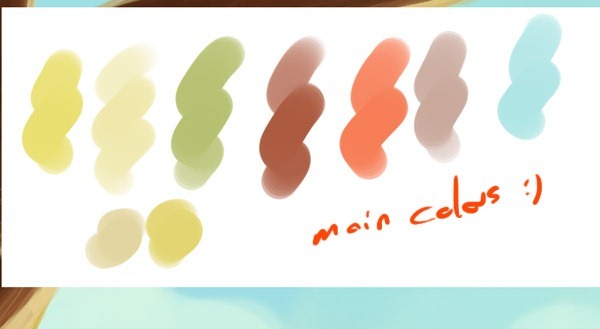
Step 7
While worked on the colors, I tried to figure out the main light first. Where the light came from? What color is it?. There is a yellow light at the background and there is another color on the front.....Now that the general details are almost fixed.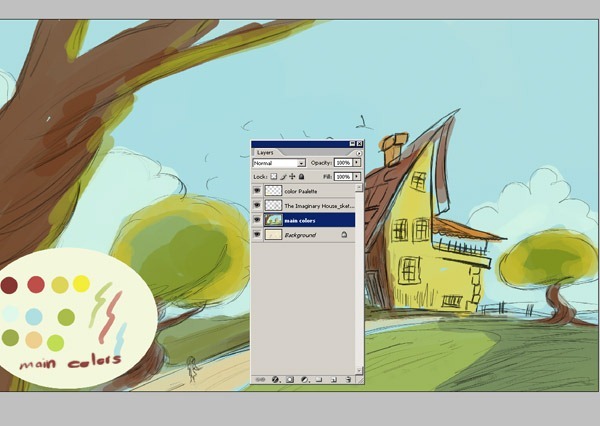
Step 8
Here I have 3 layers, one is main color another is sketch and the other is background. Now here I have closed the "main color" layer. And here see the at the background colors. Now I am giving you the main sketch so you can see the layers.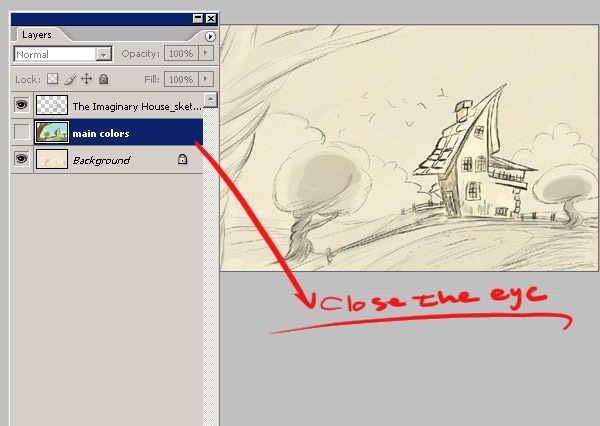
Step 9
Now I am going to show you how to merge two layers. Firstly change main color layer setting to Multiply. And then click on the right on the mouse or with main color layer selected, go up to the Layer menu at the top of the screen and choose Merge Layers down near the bottom of the list. Or for a faster way, press the keyboard shortcut Ctrl+E (Win) / Command+E (Mac). Here we leave the sketch layer. You don't need to merge the sketch layer.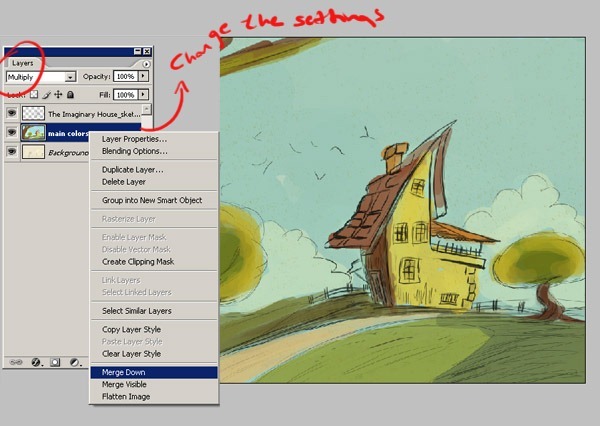
Step 10
Here, two layer is merged down and now we can continue to coloring process. You must do the same on your own project. We have now only two layers. And at this step I would like to change the size of my file because I'll begin to add more details so I'll need a bigger file size. So open Image/Image Size and make the settings as you see 2000x3072 and 300.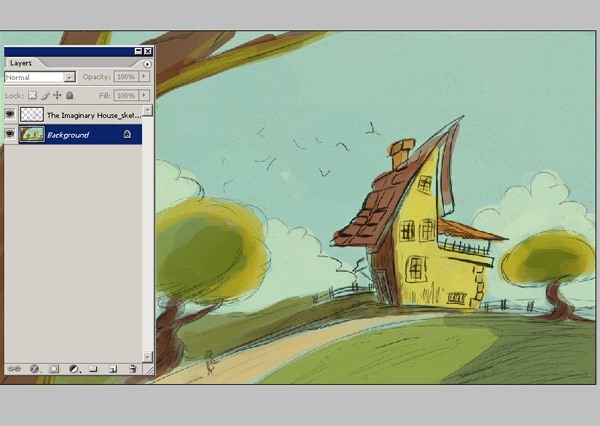
Step 11
Here now we can began to open new layers for each main objects in the canvas. Here is a new layer for the house. And also I have closed the other layer. As you see it was just a try for to see the main idea and the main colors. Here we did see the image as a whole in this step. On the next steps I'm going to create some more layers. The reason for painting on such new layers because of you need to make corrections later in the painting. It is much easier to fix errors if the main elements of your painting are separate entities. This step is really really very important.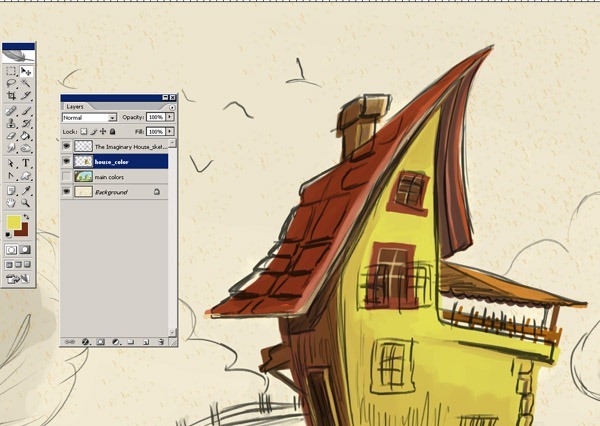
Step 12
Firstly make a selection the upper window then copy and paste (Ctrl+C/Ctrl+V), save the top and merge down the layers (Ctrl+E). Here now we have two window and one layer for both of them , I continue work with the windows .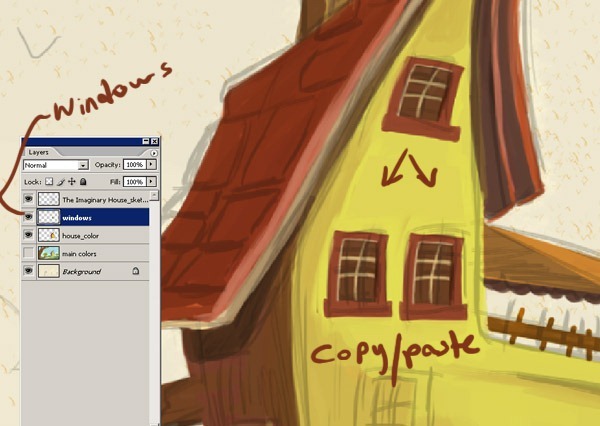
Step 13
When I am looking for a color, I process like this. After deciding on the best colors I could get, I started adding more details.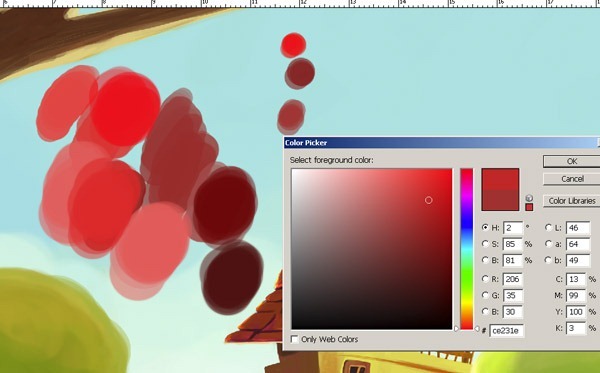
Step 14
Now I open a new layer for the tree and adding details and I used Color Balance (Ctrl+B) play with the color levels in Shadows, Midtones and Highlights for this layer. Also I add some editing of the parts by Clone Stamp (S) to remove unwanted areas.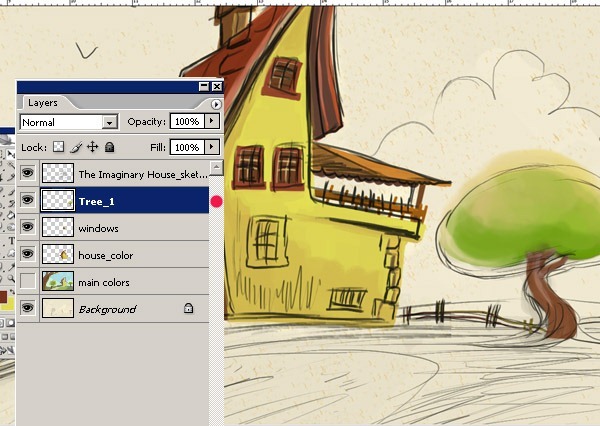
Step 15
Here, I re-open the main colors layer...so we can see now how the house and the tree looks with this background. I also using Dodge tool and Burn tool for the tree. I'm adding some more colors. Here take a look at the tree painting. The shadowy parts began to look clear at this step.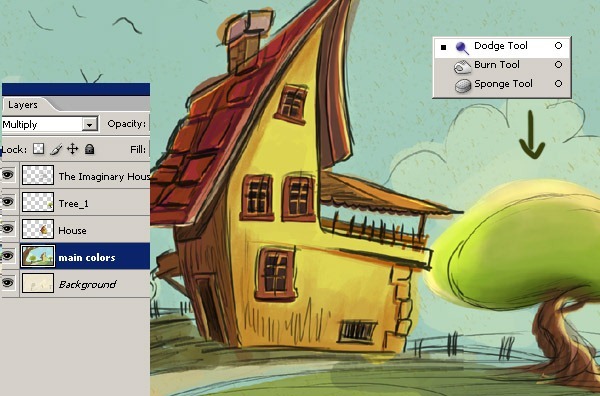
Step 16
Using little brush size add more details. Before you begin painting, you'll need to set your brush settings. Here take a look at how I draw the roof details of the house. And I used the Smudge tool a lot. The Smudge tool gives you a lot of control over the shapes, mixing or smoothing shadows.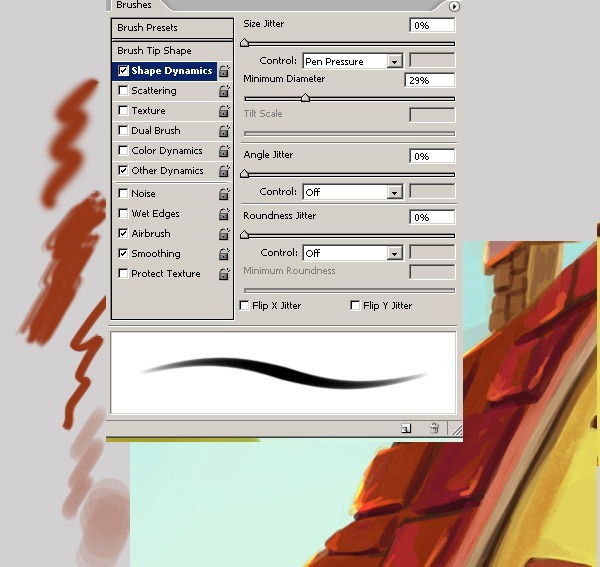
Step 17
I just used Photoshop's basic brushes, changing their size.. Chose a simple standard brush. And from Brush panel choose "Shape Dynamics" and make the setting as seen on the below picture. Then try your brush. If you don't like the conclusion of the brush settings you can always change the settings. You can change the settings as you feel comfortable with.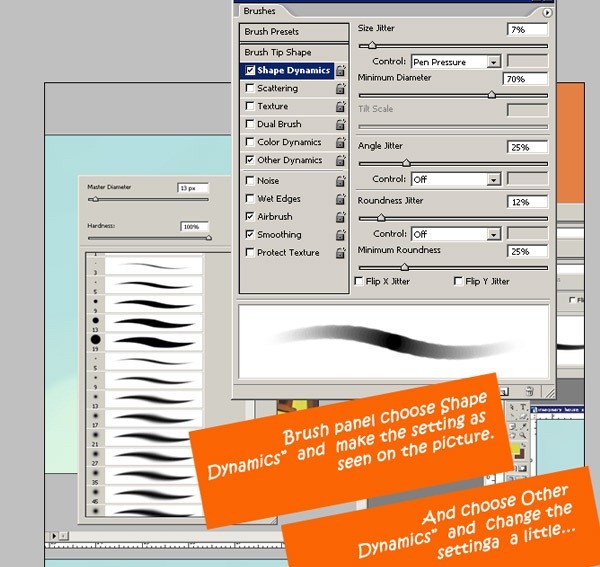
Step 18
Also I am going to use the smudge tool for certain areas on the illustration. So after selected smudge tool change the brush setting too like I did. Shortcut for the Brushes is F5.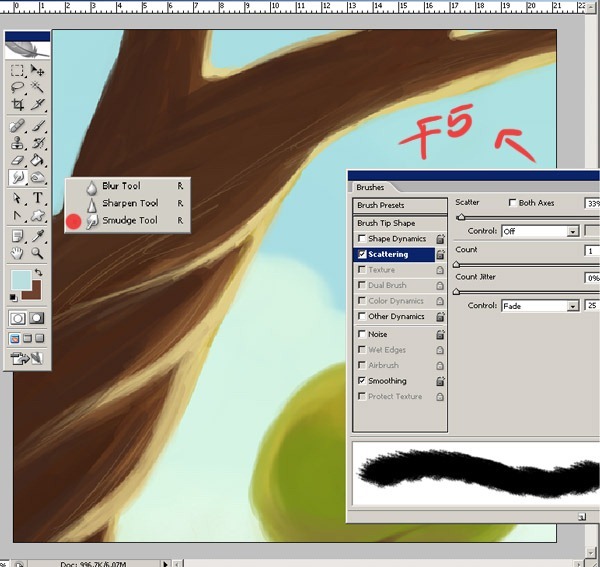
Step 19
OK, now I focused on painting other trees and the environment and the clouds. I work with distant hills too .Now the little hills start to take shape. So, you can see how the full image looks in this step: I temporarily open the sketch layer too.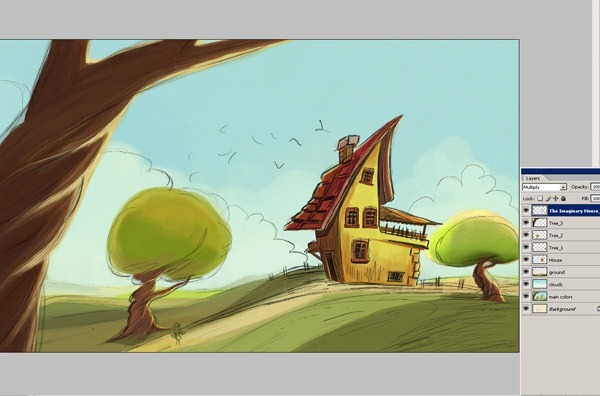
Step 20
And also I do want to show you how I added those shiny areas on my illustration. I haven't used Color Dodge this effect. I just use some different colors for this effect. Well, If this tutorial has taught you a single new thing you didn't know prior to reading it, I will feel fulfilled to have inspired the slightest glimpse in all you promising artists out there. What you must always remember is to try a variety of gadgets, tricks, tips and don't be afraid too be spontaneous.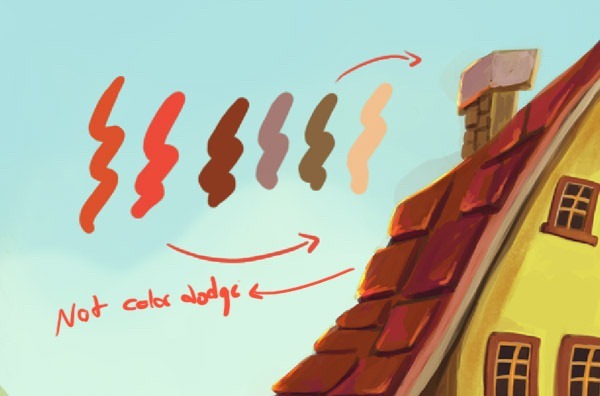
Step 21
Now it is time to clean it up! Taking eraser tool erase all the colors that will be touching to the background. Taking a small soft brush and setting is about 40% -30%. I go around with my brush tool that are going to be highly shaded. Start to add a new layers to add shades and shadows. And shadows doesn't have to be always be darker versions of the color used for the base color. it can be other colors too.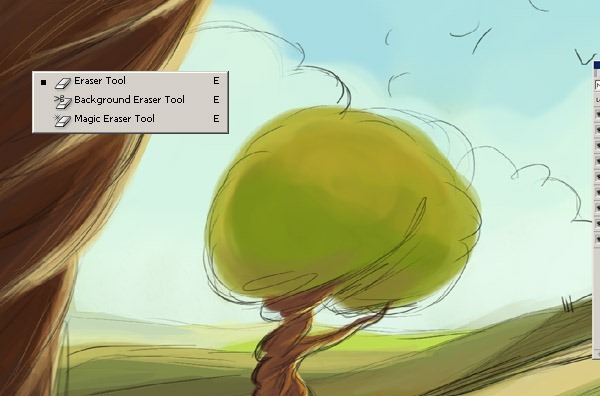
Step 22
Here I decide to start smaller details, such as flying birds and green grass and color the character. . Well now I think I basically done with the main coloring process at this point. Now lets take a look these three images and see the difference between them.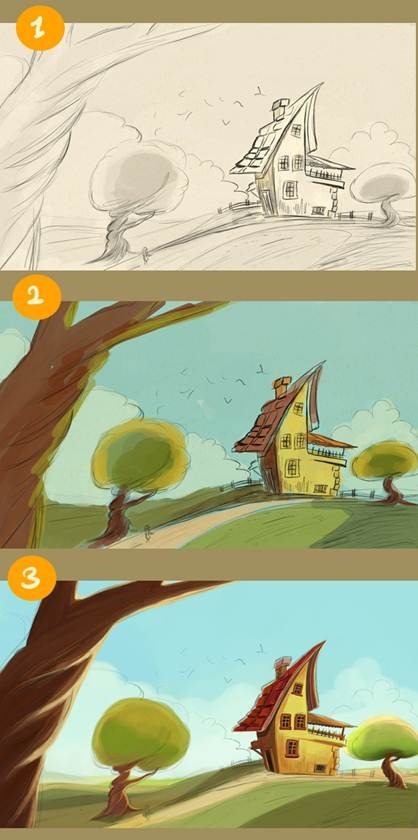
Step 23
And let me change the canvas size again. Here as you see. if you want a drawing with a lot of details you have to work on a large canvas around 3000 or 2600 pixels.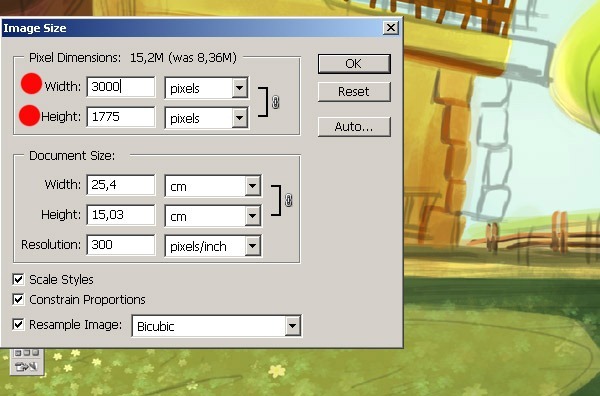
Step 24
It's only details now. We are going to detail all the environment. Remember, start a new layer for details. Always pay attention to lighting. Keep in mind the direction of the light is falling. I am adding some more color and some details for the cartoon house. When I do want to add some more light on the painting I am going to chose color dodge from here. After running through a few possibilities, I decided on the one shown. Take a look at the details on the side wall. I take the sketch layer a little side so you can see the difference.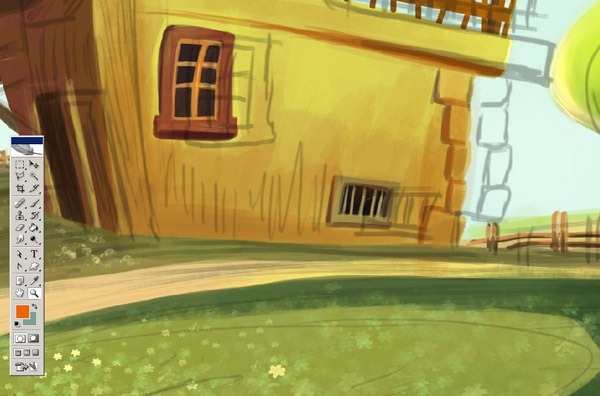
Step 25
Here this image shows how I drew the details on the tree trunk. The brush size. if you want to work in details you can change the brush size. I further detailing on the tree , using a small hard round brush and soft round brush to smooth it out as I went along. I added some colors, and decided that I wanted the tree must have have some more tree branches but I can change it later maybe..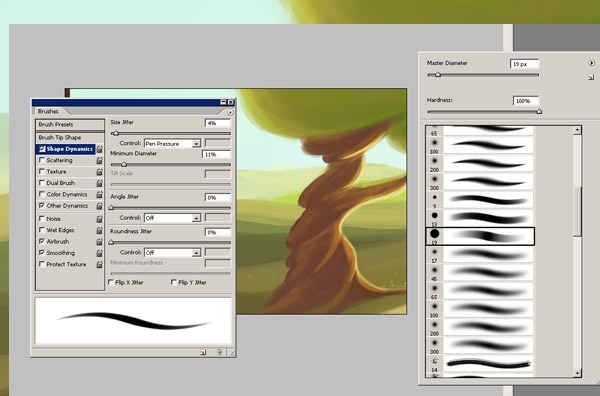
Step 26
So I here is my girl character painting. Make some color painting with this character. I'm adding some more colors and also I'm making some changes about sketch layer's opacity. Here take a look at character painting. Her figure began to look clear at this step.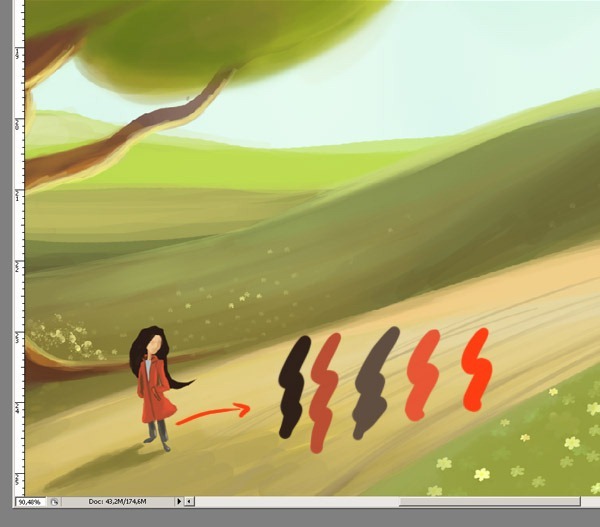
Step 27
Here it is almost finished now and I do think there are only a few details left. I'll now begin to detail the ground, adding more yellow and green colors.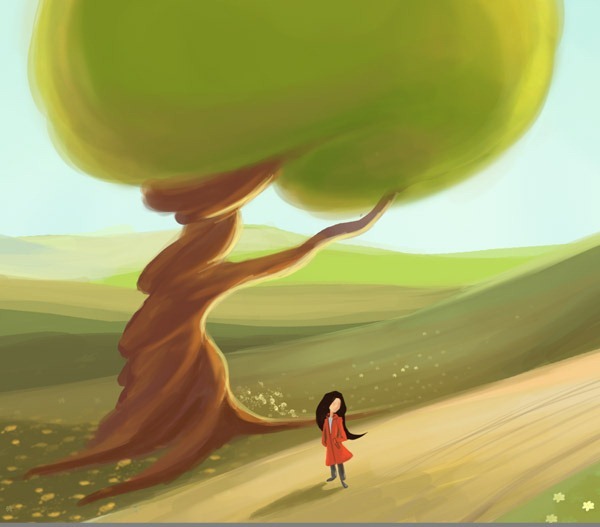
Step 28
I then duplicated the image. Flattening the layer, I adjusted the image using the Brightness/Contrast tool (located under Adjustments in the Image tool list) until I achieved the desired effect. Now this was where things got fun. Here I used Control+U (windows), (Image>Adjust>Hue/Saturation) on pretty much every layer to tweak it for effect.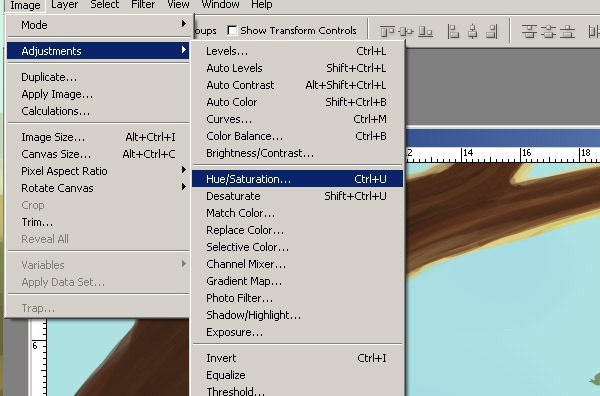
Step 29
If I wanted a warmer light, I would shift the hue of just the Highlights layer. Here (Image>Adjust>Hue/Saturation) settings must be like this one.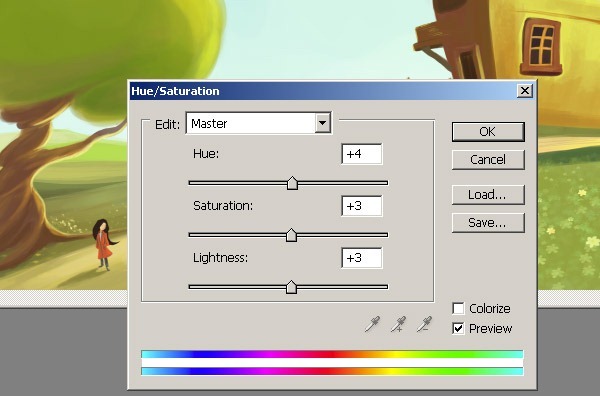
Step 30
I am going to add some final touches with a different way. firstly I have made a copy of the final illustration layer. I am going to use Blur effect . Choose Filter/Gaussian Blur.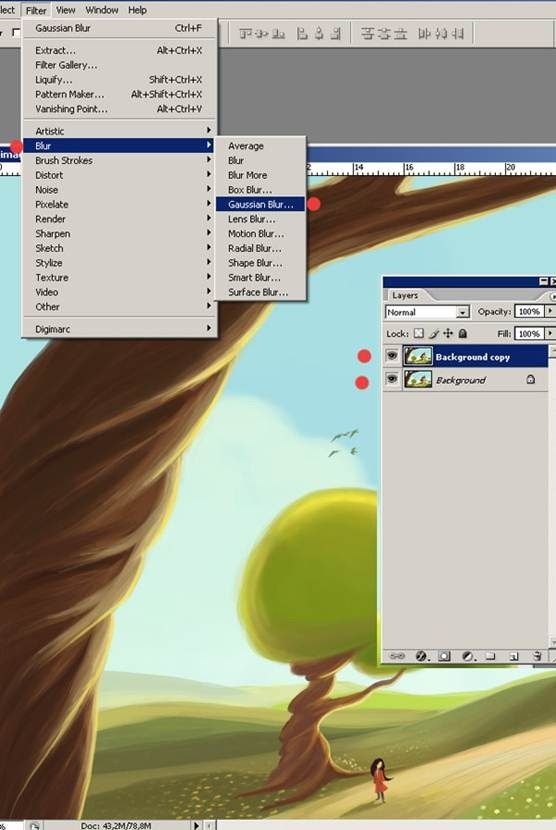
Step 31
Here make the Radius setting 29.8.
Step 32
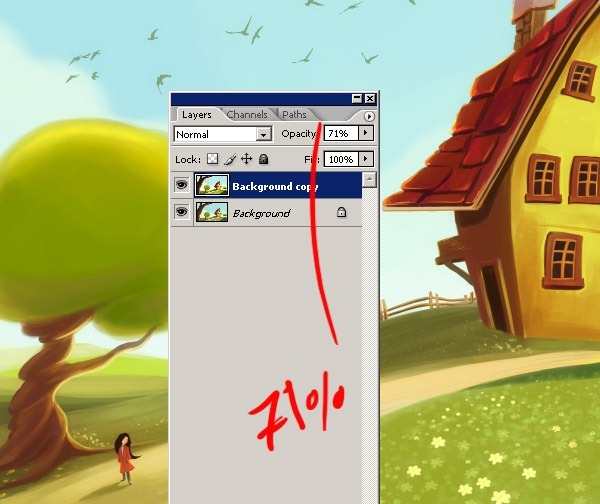
After making Blur , from Edit panel choose Fade Gaussian Blur. And also you must select the Soft Light option from the window too. And now after all those steps and changes, our new layer is looking a little bright so click on Opacity and make the setting as seen on the image.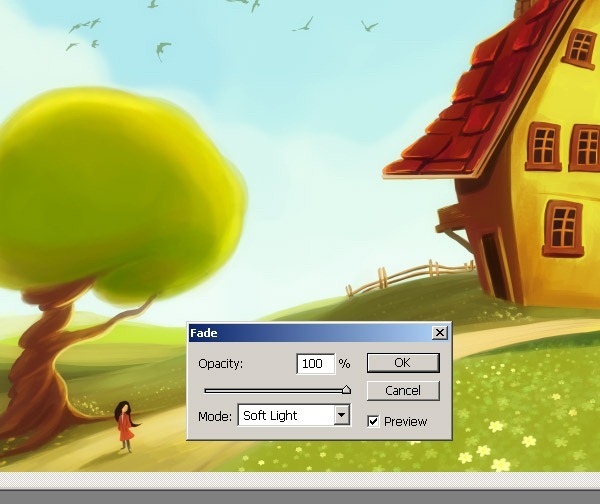
Step 33
Now make the Opacity setting 71% . Now we need to merge the two layer. To merge all layers, press Shift+Ctrl+E (Win) / Shift+Command+E (
Final Results
Here now I have decided to finish the illustration otherwise I'll be working on this image forever. I hope you don't think that by reading this tutorial it will be the same as by actually doing it. And this is the final product of the "The imaginary House". I wish I could spend more time on it. I hope this tutorial will be useful to some of you. Of course there are many other ways to get a similar result. Well, if you use this tutorial, it would be very nice to write comments :)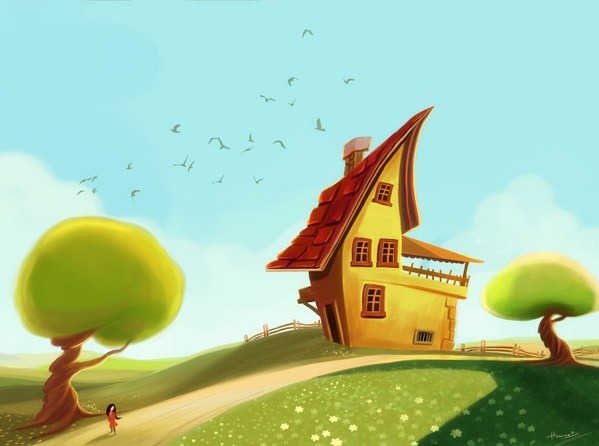
Keine Kommentare:
Kommentar veröffentlichen