
This tutorial walks you through using beginner to advanced techniques to create a modern Japanese art poster of a Geisha, using stock textures, brushes and photos in Photoshop CS5. You will learn how to use masking and selection techniques, layer adjustments and custom brush settings to turn a photo into art. You will also learn how to use strokes and shapes to make her robe come alive.
What You'll be Making
Download the PSD
Geisha.zip | 40.27 MB
Download from Website
Download from Website
Gorgeous Geisha Art Poster Photoshop Tutorial
Resources
- Watercolor Brushes - Bit-Box
- Vintage Paper #30 - Lost&Taken
- Grunge Paper #5 - Lost&Taken
- Geisha photo - Jon Rawlinson (CC)
Step 1
Launch Photoshop and create a new document. I decided to use the Photo preset with the 4 x 6 size for printing on cards, but you can choose any size you wish.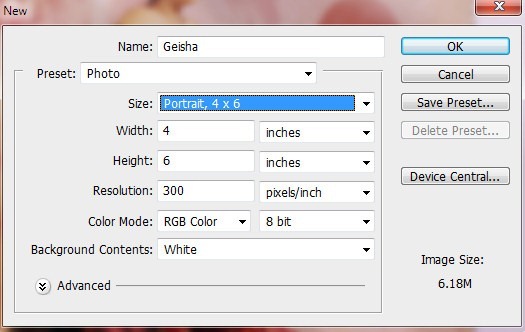
Step 2
Click on "File > Place" and select the vintage paper texture. Scale the image to fill the document by clicking and dragging on the little black nodes. Drag the right edge a bit further until the majority of the shadow disappears, as we want the light area in the middle to frame our subject.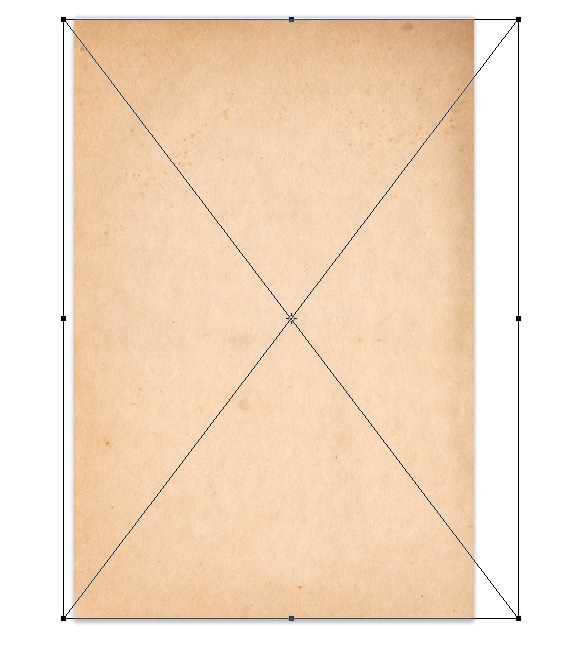
Step 3
Create a new layer and repeat step 2 to place the grunge texture. Click the corner to activate the Transform Tool. Right-click and choose "Rotate 90°CW" to turn the texture on its side.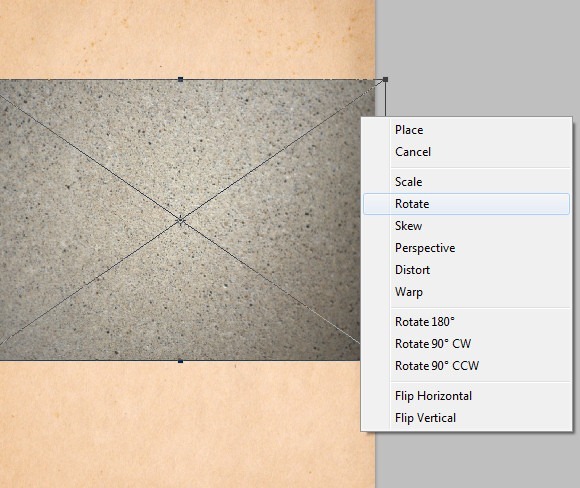
Step 4
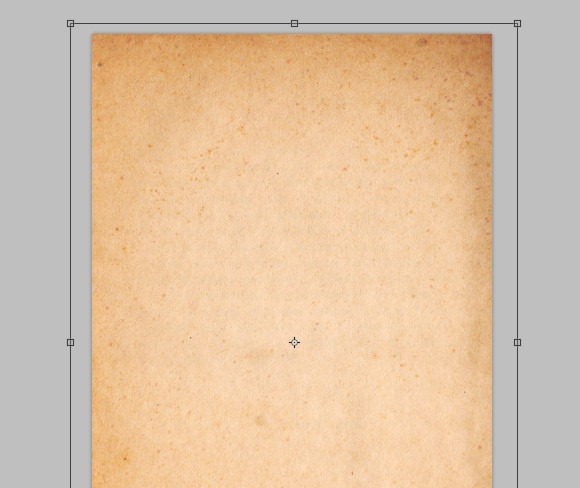
Drag the corners to fill the document with the grunge texture and then select "Color Burn" from the layer options menu. Set the Opacity to about 30% to get a nice subtle glow.
Step 5
Click on "File > Place" and choose the photo of the Geisha. Scale the image until the Geisha on the left fills about two thirds of the frame. Position her off to the left as I have done here: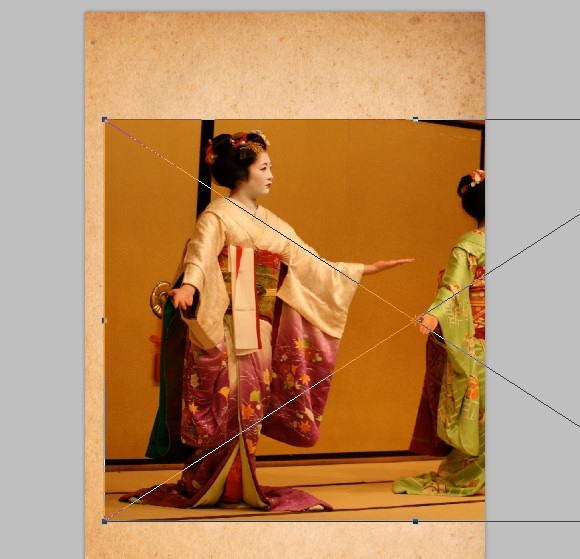
Step 6
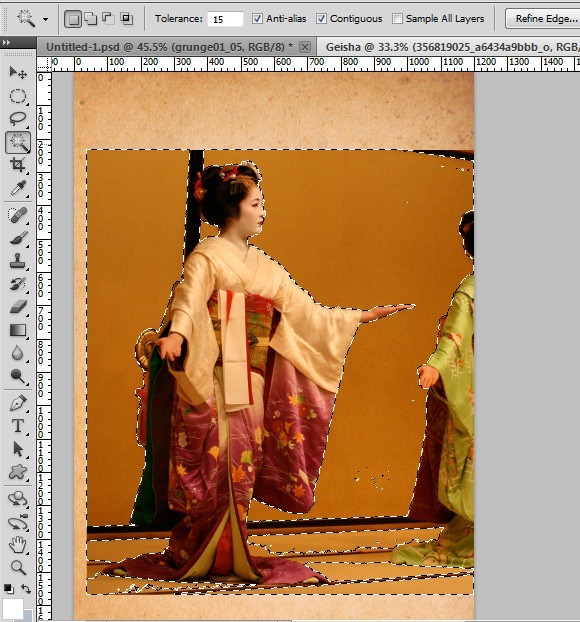
Next, you will need to get rid of the background. There are several techniques for doing this and if you already know one you are comfortable with, continue to use it, otherwise you may try my shortcut method. This method is best for images with large areas of color.Choose the Magic Wand Tool by right-clicking on the Quick Selection Tool in your left toolbar. Ensure the New Selection option is clicked in the tool option bar, and set the Tolerance to 15. Left-click the orange areas of the background while holding down the Shift key to create one large selection.
Step 7
Click "Layer > Layer Mask > Hide Selection" from the Photoshop menu. This will add a layer mask to your Geisha layer that will allow you to remove the rest of the background. You could also do this by deleting the selection alltogether, or by using the eraser tool. Masking is better because you can reverse any screw-ups easily by painting back over the masked area..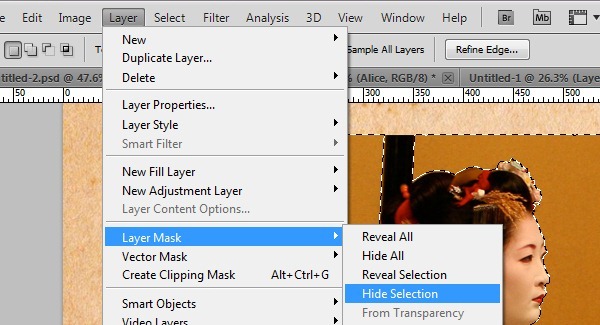
Step 8
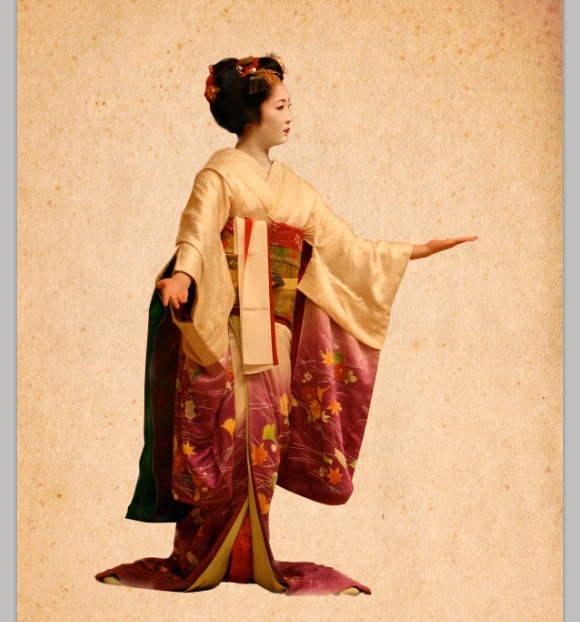
Set your foreground color to white and use the Brush Tool to paint over the remaining pieces of visible background until only the left Geisha remains. If you mess up at any point, you can switch the foreground to black and paint the missing part back in.When using masks, always remember to click the Mask Thumbnail in the layer panel before painting.

- Reduce the hardness when working around the hair and when refining the edges of the face.
- Use smaller brush diameter for better detail.
- Adjust the brush size on the fly by using your [ and ] keys.
Step 9
Right-click your finished Geisha layer and choose "Duplicate Layer." Select "Overlay" from the layer options menu to give your Geisha a brighter color and contrast.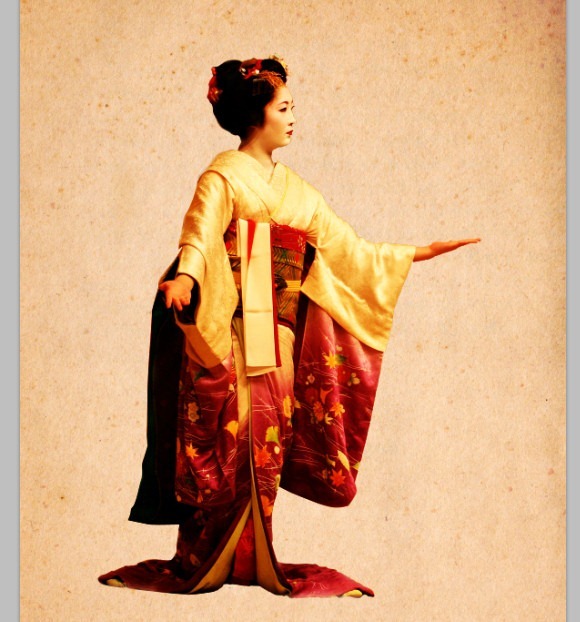
Step 10
Choose the Brush Tool and open the Brush Panel. Click the Preset Manager button at the bottom of the window to load your Watercolor brushes.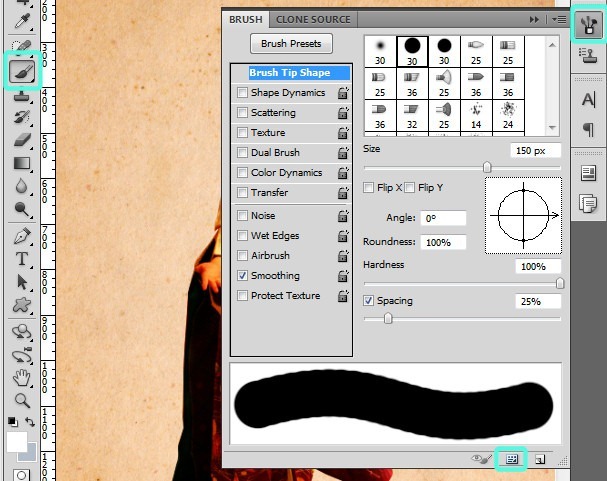
Step 11
Use the Eye Dropper Tool to sample the bright red color from the Geisha's kimono. Create a new layer and call it "Paint." Drag it below your Geisha layers.Return to the Brush Tool and select the "watercolor_11" Watercolor brush. To see the brush names, hover your mouse above the brushes and wait a moment for the tooltip to appear. Adjust the size to about 1500 and click once over the Geisha to get the effect I have here by lining up the brush outline of the round spot with her hand:
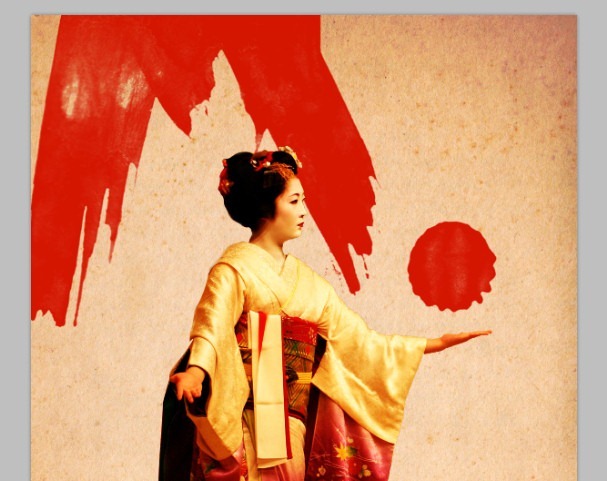
Step 12
Paint around the subject, experimenting with the other brushes, sampling yellows and magentas from the kimono. To rotate the brush, open the Brush panel and drag the compass to change the brush angle. If enabled, uncheck "Spacing" to make it easier to preview.Tip:
To create the appearance of the black part of the robe blending into the paint, use the Watercolor_5 brush at about 600 pixels.
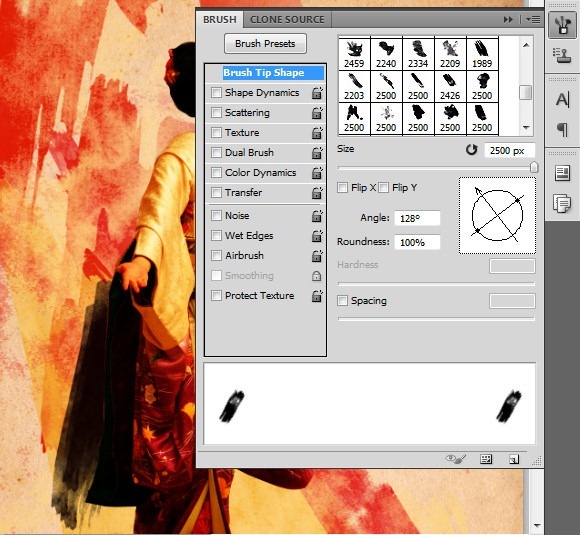
Step 13
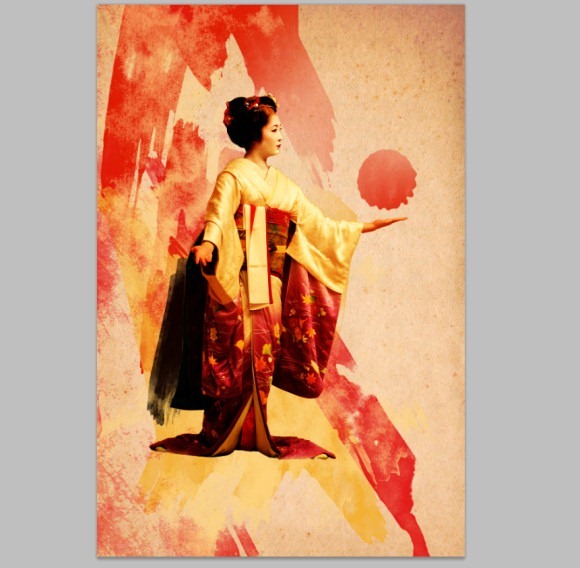
Select the Eraser Tool and use a large soft brush size to go over the paint edges between the Geisha's face and the upper half of the circle splatter. This technique helps accentuate the brightness of the Geisha's face and sleeve, and gives our art a light source. Depending on your history settings and experience level, you may opt to use a layer mask here instead.Here is a look at my finished layer:
Step 14
Create a new layer above your Geisha layers and call it "paint2." Sample a bright red color with the Eye Dropper, then select the "watercolor_2" brush with the Brush Tool. Set the size to 1100 and click below the Geisha's feet.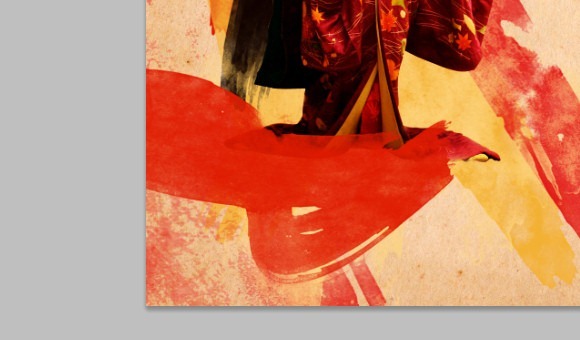
Step 15
Set the foreground to white and select the "watercolor_7" brush. Rotate it -80 degrees and click the Geisha's hair to add a painted hair ornament. Repeat to add the second, adjusting the angle and size slightly for variation.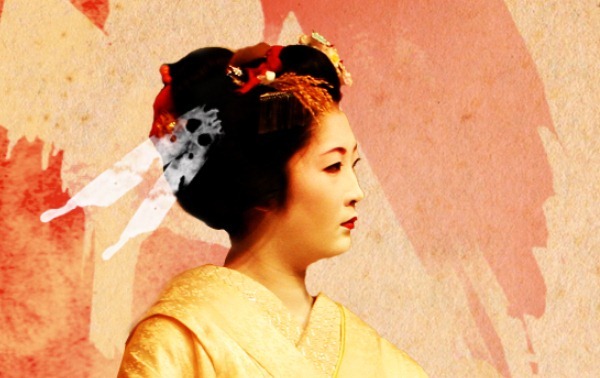
Step 16
Create a new layer and call it "accents." Sample an orange or yellow color from the kimono and choose the "Scattered Maple Leaves" default brush. Experiment with rotation, color and size, painting sparingly off both sides of the kimono. The effect you want to achieve is the appearance of leaves blowing off the kimono into the canvas.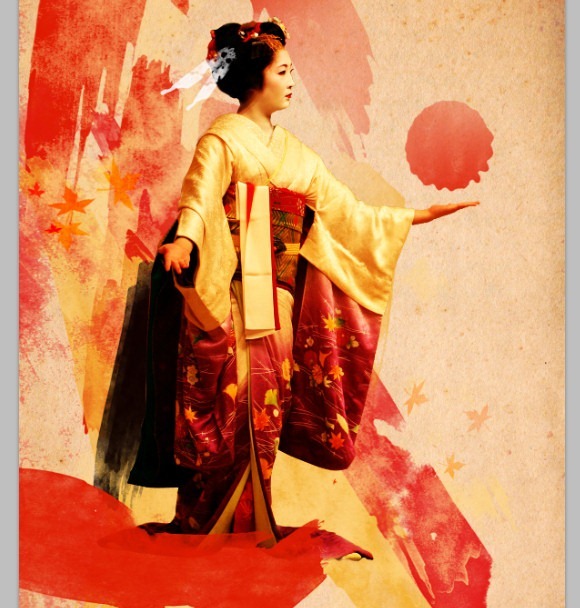
Step 17
Set the layer with the leaves to "Hard Light." With the layer selected, click on "Layer > Layer Mask > Reveal All" from the Photoshop menu. Choose a large soft brush and brush over the leaves on the right side just enough to make them look like they are fading into the background.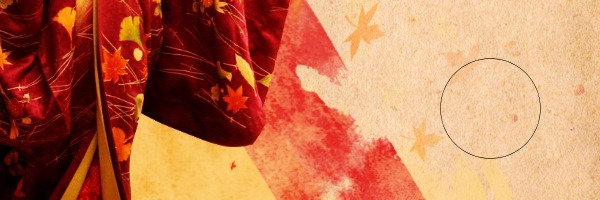
Step 18
Create a new layer called "threads." Set the foreground to white and choose the Pen Tool. Ensure the "Paths" and "Add path to area" options are selected in your Pen Tool Option toolbar.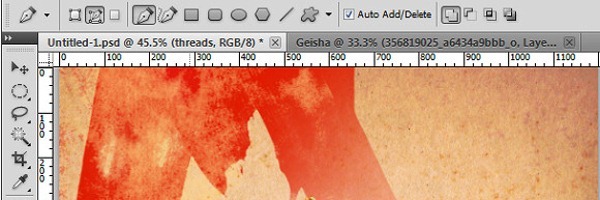
Step 19
Draw several lines extending from the Geisha's palm towards the edge of the image. Remember to drag between points to crease flowing lines. When you have finished setting one path, right-click and choose "Stroke Path." Leave "Pencil" and "Simulate Pressure" selected and click "OK." Hit "Enter" to create the line.Repeat this process to add some threads flowing from the lower right side.
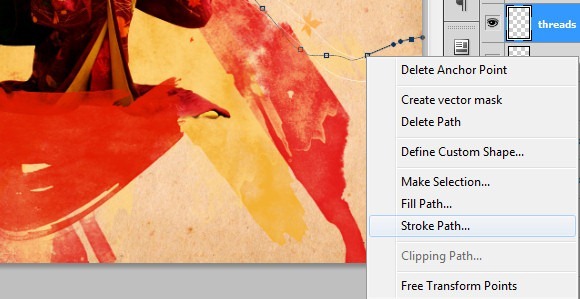
Step 20
Select your first paint layer and add a new layer. Set your foreground to white, choose the "watercolor_15" brush and set it to a medium size. Right-click the Pen Tool in your left toolbar and choose the Freeform Pen Tool. Draw a curvy outline around the Geisha's top half. Right-click and choose "Stroke Path" and select "Brush." Experiment with different brush sizes and angles until you get a look you like.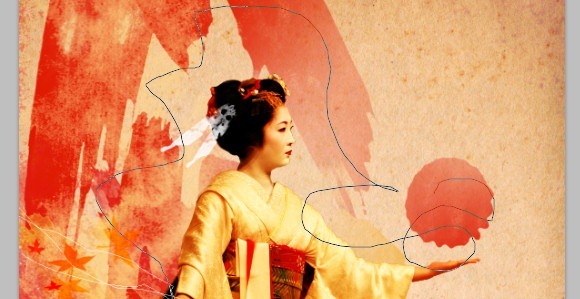
Step 21
Set this layer to Overlay and reduce the Opacity to about 30%.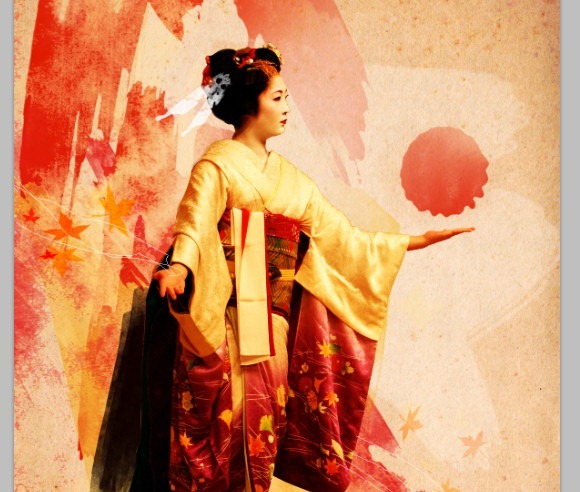
Step 22
Select your top-most layer and add a new layer above it called "lines." Right-click the Rectangle Tool and choose the Line Tool. Set the foreground to black and the line weight to 1 px. Draw a few lines extending from the circular splatter to the upper right edges of the image. This simply adds a modern feel to the art and balances the blank corner. Reduce the layer opacity to about 30%.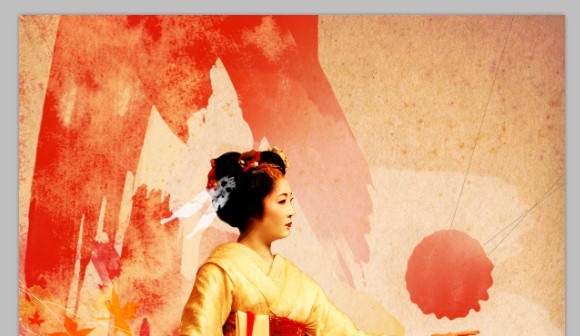
Step 23
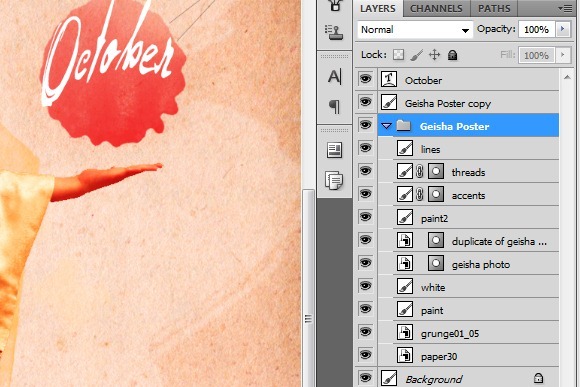
Truly personalize your design by adding some text. For this demonstration I have added the word "October" over the red platter using Don Quixote, a free font you can download here. Warp the text to add an Arch, and resize to fit inside the red shape to get the effect I have here.
Step 24
Let's finalize the look by adjusting the color. This process will take some of the edge off the yellow and make the colors more vibrant. First you will need to create a flattened version of your work, but rather than flatten everything and lose your layers, it is best to create a duplicate.Select all of your layers except the text and background by holding Shift and clicking each one, then click "Layers > New > Group From Layers" in the Photoshop menu. Your layers will be collapsed into a group in your Layers panel.
Select the group and choose "Duplicate Group." Right-click the duplicated group and choose "Merge Group."
Step 25
Select the merged layer and click on "Image > Adjustments > Hue / Saturation." Set the Hue to 8 and the Saturation to 10 and click "OK."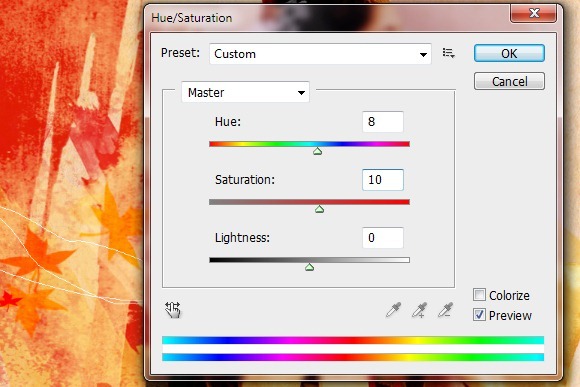
Final Results
![GeishaArtTutorial_byV[1] GeishaArtTutorial_byV[1]](http://photoshoptutorials.ws/images/stories/7d1769fc5802_1309/GeishaArtTutorial_byV1.jpg)

Keine Kommentare:
Kommentar veröffentlichen