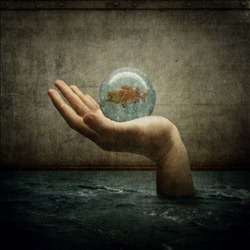
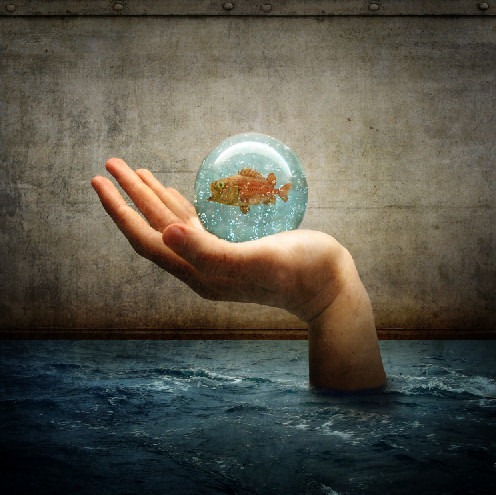
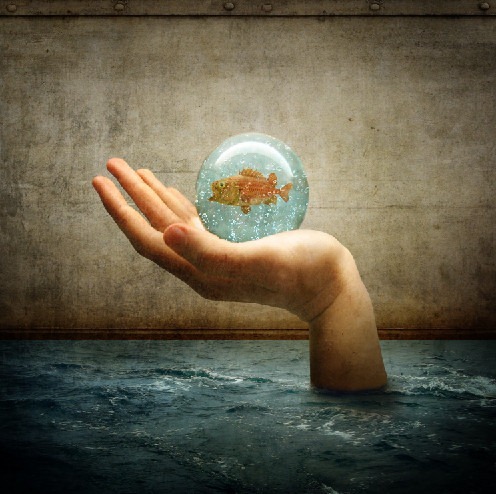
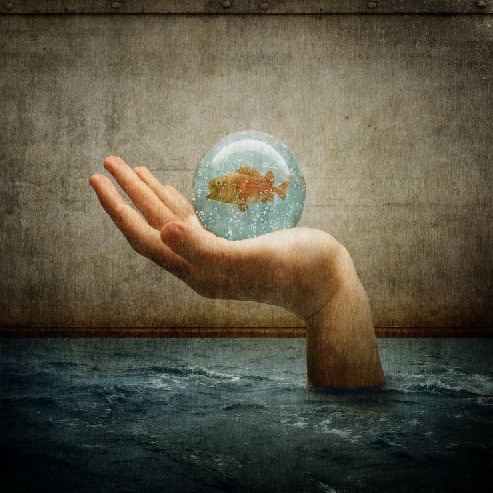
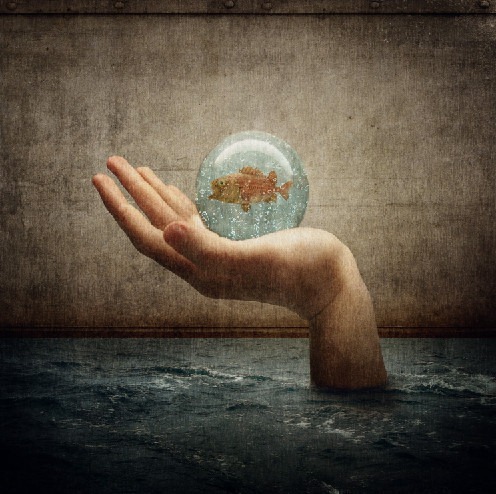
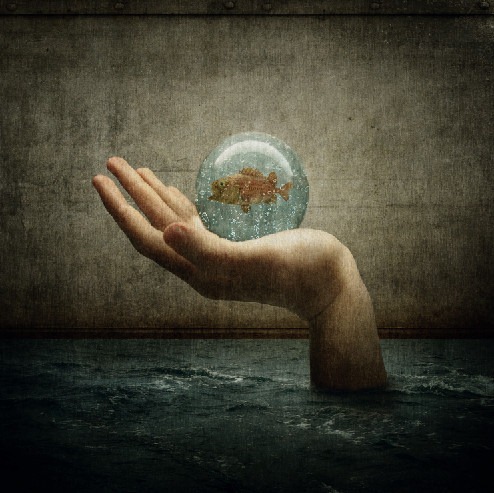
In this Photoshop tutorial, we will learn how to create a dirty, flooded room with a giant hand saving a fish inside a glass ball. We will learn how to blend images together seamlessly using several stock photos by using several Photoshop tools such as the Transform tool and the Brush tool. We would learn how to use Blending modes to make a water photo appear inside a glass ball. We will also learn how to fix and enhance the lighting of an image.
Preview of Final Results
Download the PSD
How to Create a Disturbing Scene of a FloodedRoom with a Giant Hand Carrying a Fish PSD.zip | 189.98 MB
Download from Website
How to Create a Disturbing Scene of a Flooded Room with a Giant Hand Carrying a Fish
Resources
- Wall Texture – shadowh3
- Stormy Sea – darkrose42 stock
- ball3 – LuckyStock
- Scary Fish – xNickixstockx
- Water on glass I – deadenddoll stock
- Grunge – e dina
- Paper Texture 1 – Wojtar Stock
- metal texture 15 – Wojtar Stock
Step 1: Create a New Image File
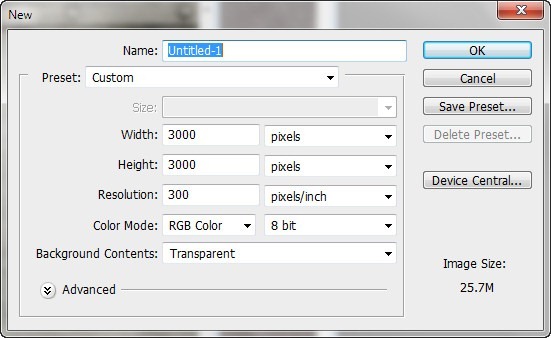
We will start by creating a new image file, go to the Menu bar and click File > New, and then input the following values on their respective fields:
- Width: 3000 pixels
- Height: 3000 pixels
- Resolution: 300 pixels/inch
- Color Mode: RGB Color; 8 bit
- Background Contents: Transparent
Step 2: Create the Wall
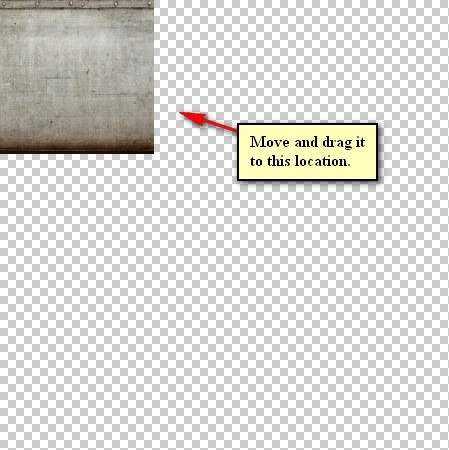
In this step, we will be creating the walls within this dark tunnel. To start, let’s open “Wall Texture” by shadowh3. Once open, activate the Move tool (press V on your keyboard) and then drag it to our canvas by left-clicking and moving it to our canvas.
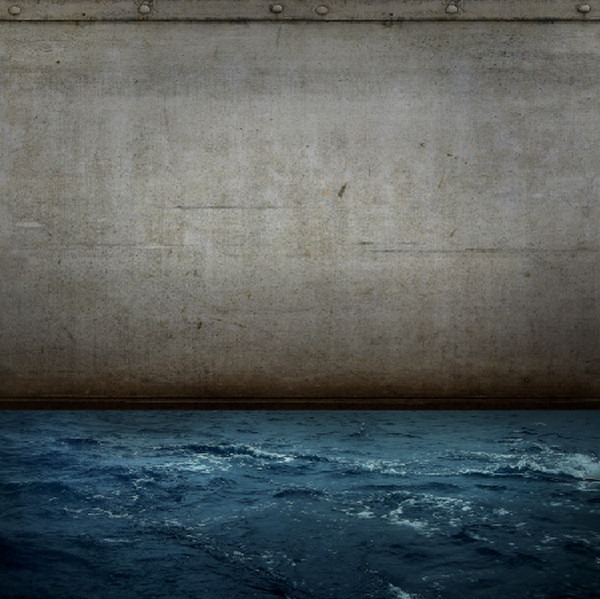
Once on the canvas, it should appear like this:
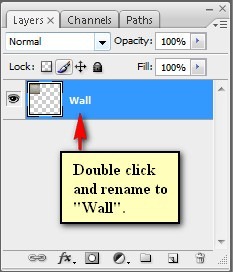
Now, we will have to rename this layer to avoid confusion in later steps. To rename a layer, simply double-click on the words: “layer 1” (which is our layer - “Wall Texture”) to prompt a text box to appear. Once that appears, you may now rename the layer to “wall”.
See sample below:
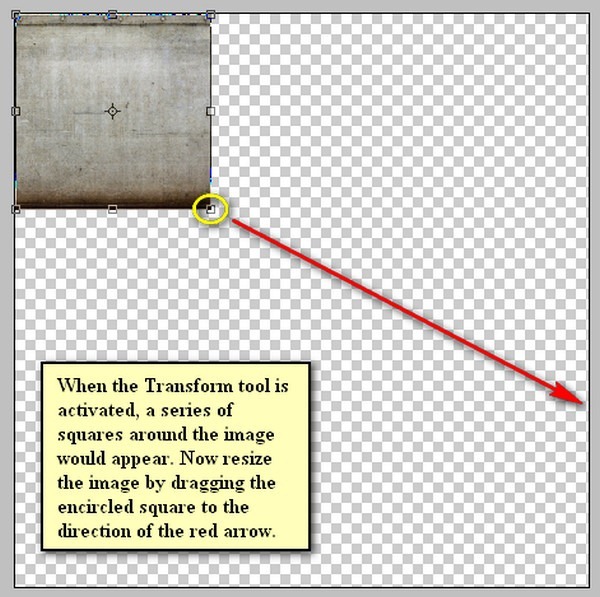
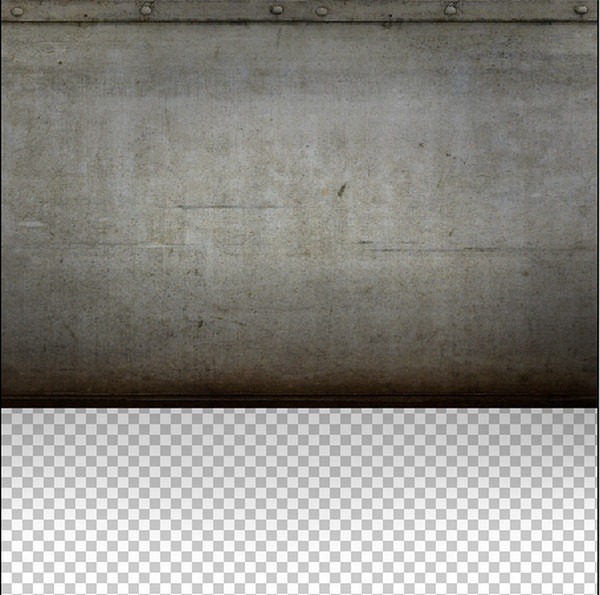
Next, we will have to transform this “wall” to make it look like a wall; to do that, activate the Transform tool (Ctrl/Cmd + T) while the “wall” layer is selected and then resize it as shown below:
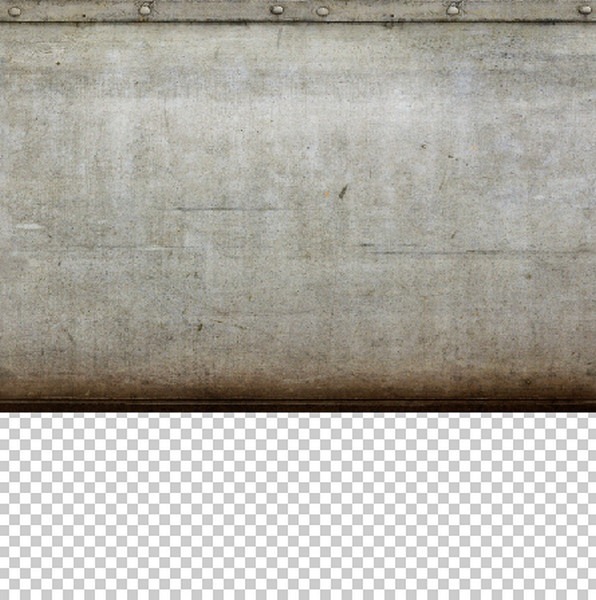
The result should be similar to this:
Next, we will fix the light of the walls and to do that we would need to paint on it. To start, click on the Layer window and then create a new layer (Ctrl/Cmd + Shift + N) and then name this layer to “Darken Wall”.
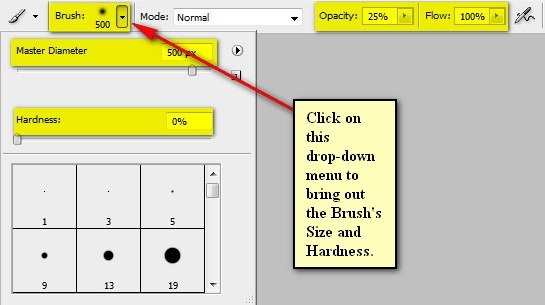
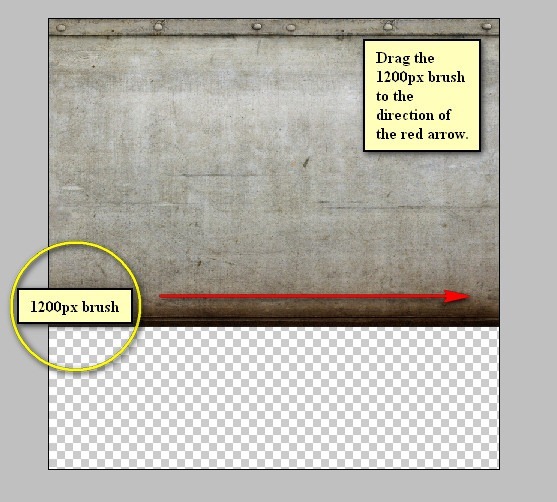
Now, activate the Brush tool (B) and then input the following:
- Brush size: 1200px
- Hardness: 0%
- Opacity: 25%
- Flow: 100%
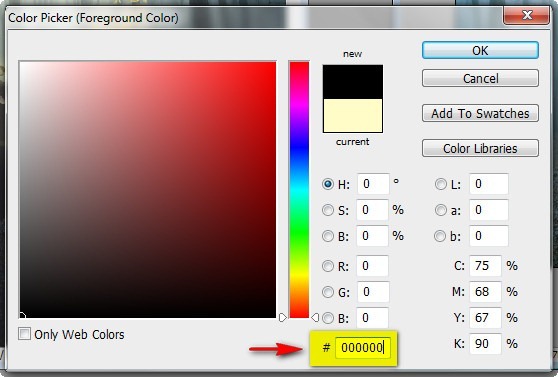
- #: 000000
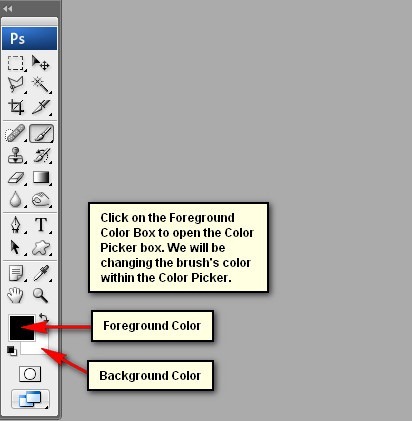
Note: The “#” means the color of the brush is black, but to make sure that you will be using that brush color follow the steps below:
After clicking the Foreground tool, the Color Picker box would open. Once open, input the following on the # space:
Now, let’s paint!
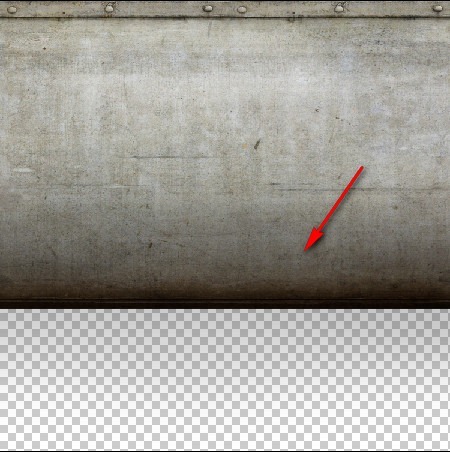
The result of that should be similar to this:
Next, let’s create another layer (Ctrl/Cmd + Shift + N) and then name this new layer: “Darken 2”.
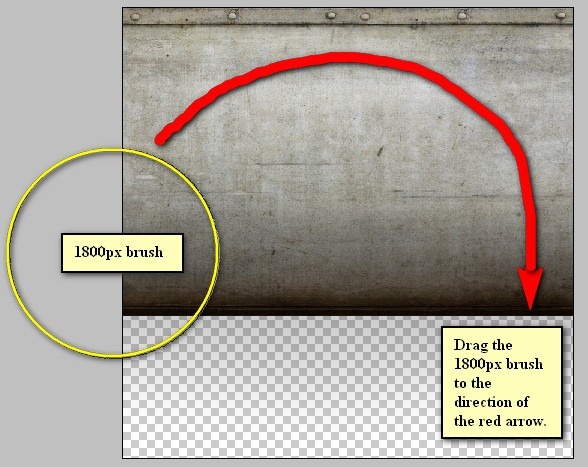
Now, activate the Brush tool (B) once again and then input the following:
- Brush size: 1800px
- Hardness: 0%
- Opacity: 15%
- Flow: 100%
- #: 000000
When you’re done, we can now start painting:
The result of that should be similar to this:
Step 3: Create the Water in the Room
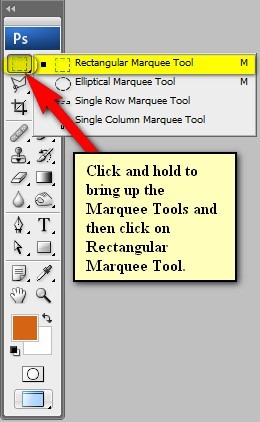
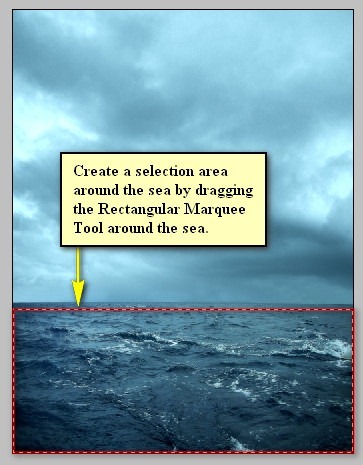
In this step, we will be filling this room with water. To start, let’s open “Stormy Sea” by darkrose42 stock. Once open, activate the Rectangular Marquee Tool (M) and select the sea from this image.
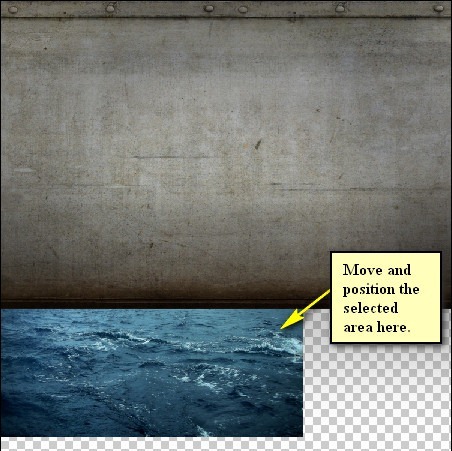
Now that you’ve created a selection area around the sea, activate the Move tool (V) and drag the sea to our canvas and position this layer above the “Darken 2” layer.
Position it in the canvas as shown on the image:
Now rename this layer to “Water”.
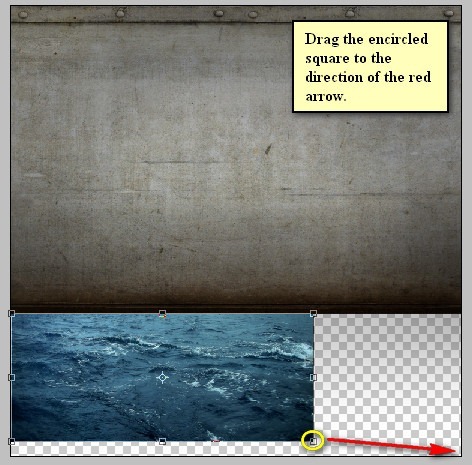
Activate the Transform Tool (Ctrl/Cmd + T) and resize the “Water” as shown on the image below:
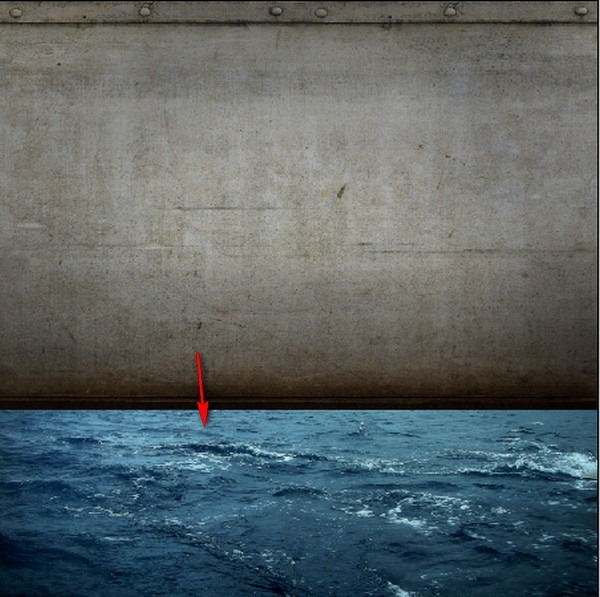
The result:
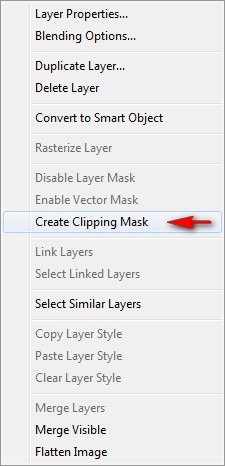
Now that that’s done, we will now darken the water to make it blend with the light of the room. To start, create a new layer (Ctrl/Cmd + Shift + N) above the “Water” layer and name it “Darken Water”. Once you’ve done that, right click on the layer and choose Create Clipping Mask so that the brush’s paint would only be within the “water” and not spread to the “Wall”.
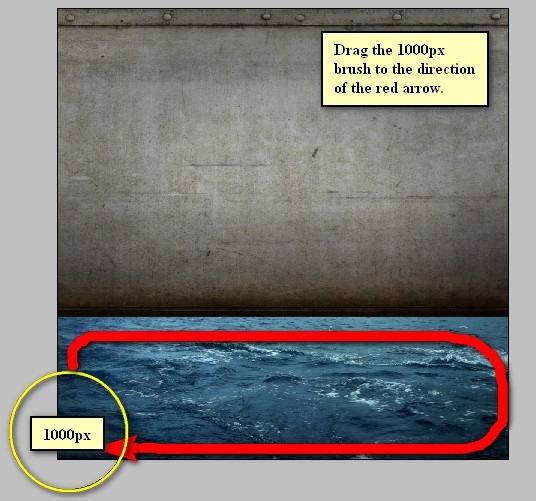
Now that you’re done, activate the Brush tool (B) and input the following:
- Brush size: 300px
- Hardness: 0%
- Opacity: 30%
- Flow: 100%
- #: 000000
Now, let’s paint:
The result of that should be similar to this:
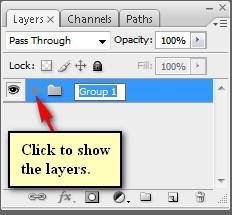
When you’re done, select all the layers that you’ve created and then group them together to avoid confusion. To group layers, simply select all the layers that you wish (in this case, all te layers) and then press Ctrl/Cmd + G. After that, you’d notice that they are all on one folder.
Step 4: Create the Hand
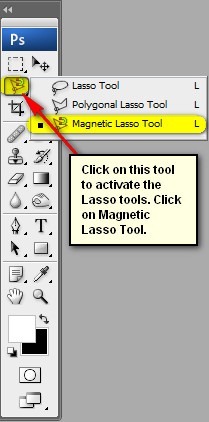
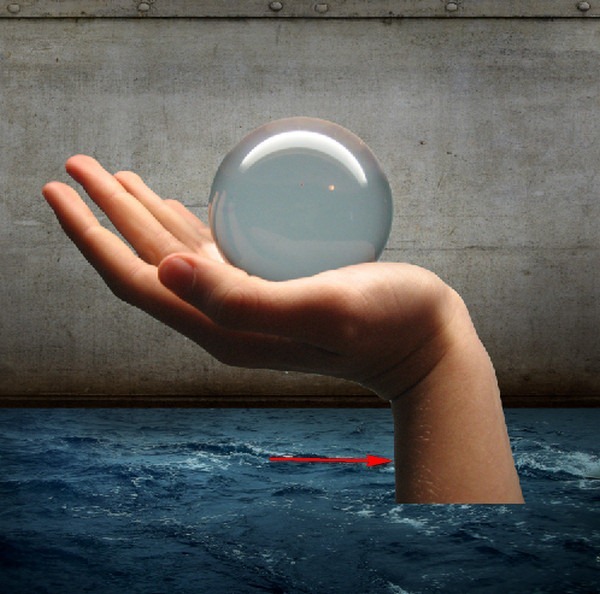
Now, we will be adding a giant hand within the room. To start, open the stock image “ball 3” by LuckyStock. Once it is open, activate the Magnetic Lasso Tool, as shown on the image below:
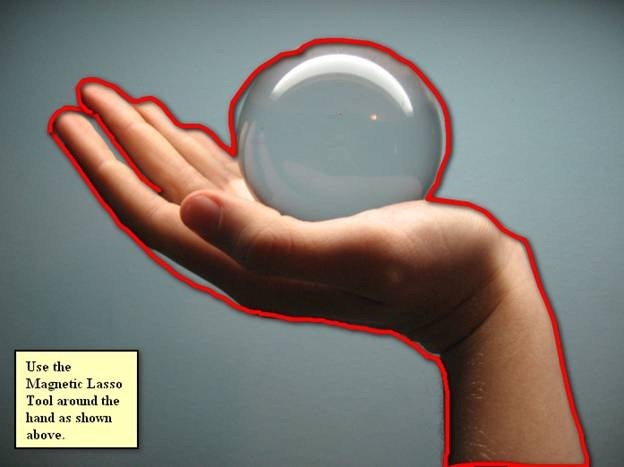
Now, create a selection area around the hand.
Once you’re done, activate the Move tool (V) and drag the hand to our canvas.
Position the hand as shown below:
Rename the layer now to “Hand”.
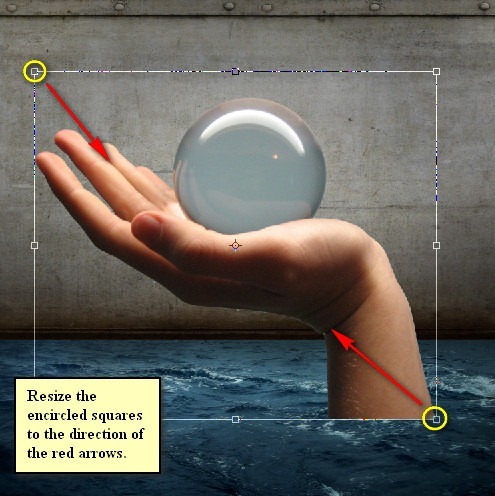
Next, activate the Transform tool (Ctrl/Cmd + T) and resize the image as shown below:
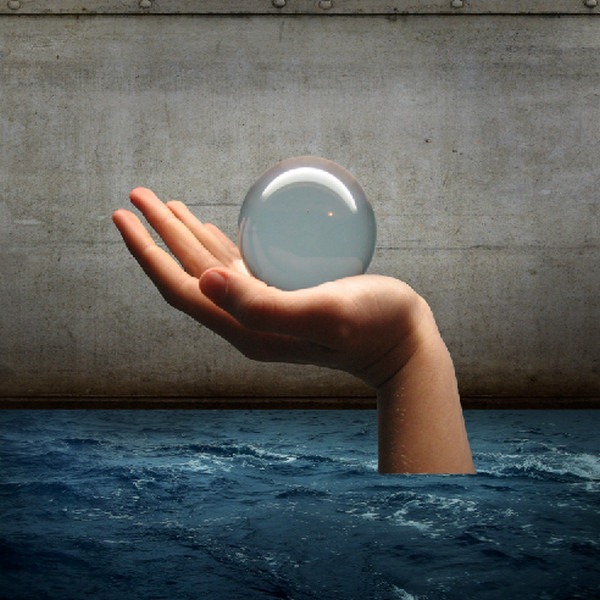
The result:
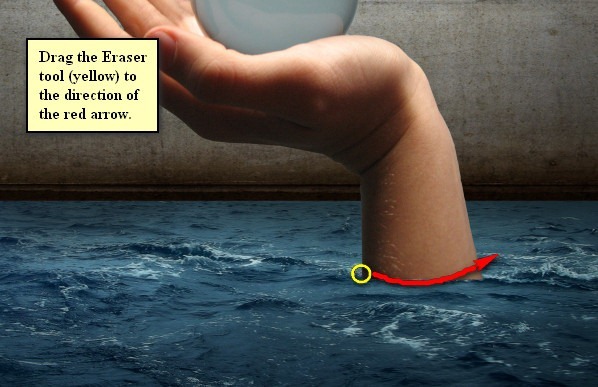
Now, we would need to erase some parts of the hand to make it look like it really is on water. To start, activate the Eraser tool (E) and input the following:
- Brush size: 90px
- Hardness: 0%
- Opacity: 100%
- Flow: 100%
When you have those ready, erase the part shown on the image below:
The result should be similar to this:
Next, we will be fixing the light and darkness of the hand. To start, create a new layer (Ctrl/Cmd + Shift + N) and then name it “Darken hand”. Once created, right click on this layer and then click on “Create Clipping Mask”.
Now, let’s activate the Brush tool and input the following:
- Brush size: 500px
- Hardness: 0%
- Opacity: 15%
- Flow: 100%
- #: 000000
Once you’ve set those, let us now paint:
The result of that should be similar to this:
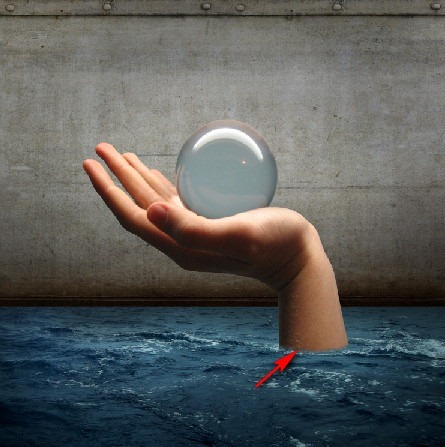
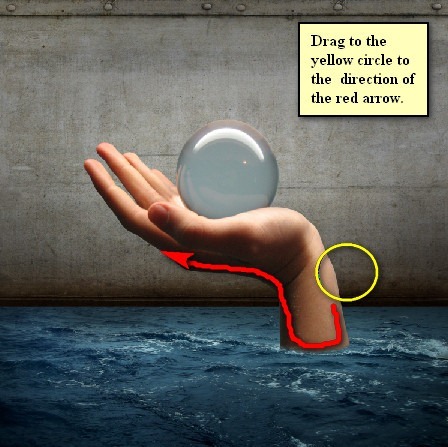
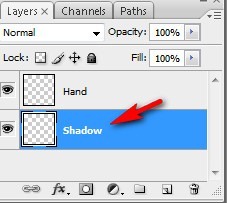
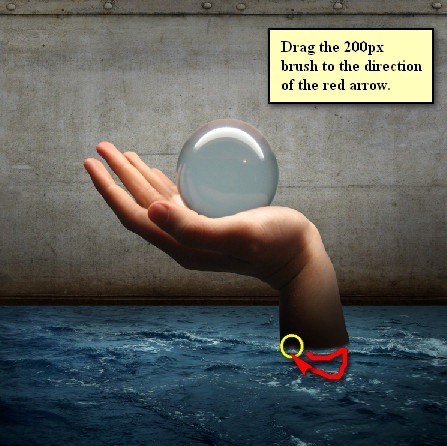
Next, we will add a shadow under the hand to create the illusion that there is light above it. To start, create a new layer (Ctrl/Cmd + Shift + N) and name it: “Shadow”.
Before you proceed, put this “Shadow” layer below the “Hand” layer because if it is above, it will be painting on the hand as well.
Activate the Brush tool (B) and then input the following:
- Brush size: 200px
- Hardness: 0%
- Opacity: 15%
- Flow: 100%
- #: 00010a
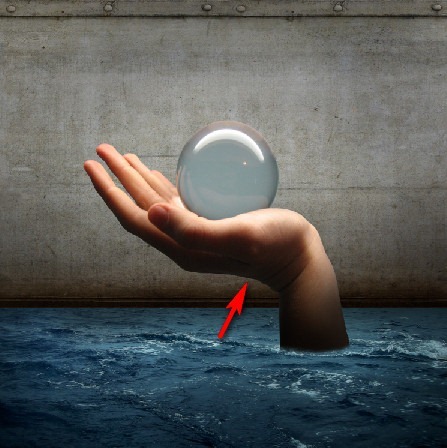
When you’re done, let’s now paint:
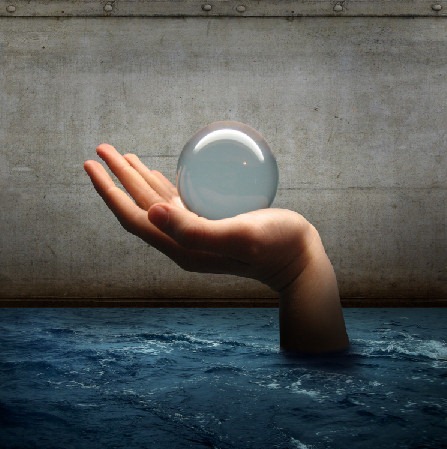
The result:
Step 5: Create the Fish
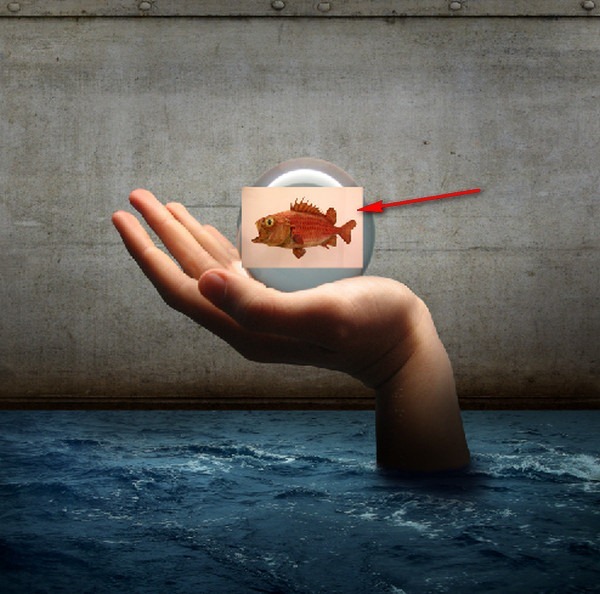
In this step we will be adding the fish which we will put inside the glass ball. To start, open the stock image: “Scary Fish” by xNickixstockx and activate the Move tool (V). Drag the whole stock image to our canvas and put it on top of all the layers. Once there, rename this layer to “Fish”.
Notice that this is a huge image so we would need the Transform tool (Ctrl/Cmd + T) to scale it to a smaller size.
Transform the fish to this size:
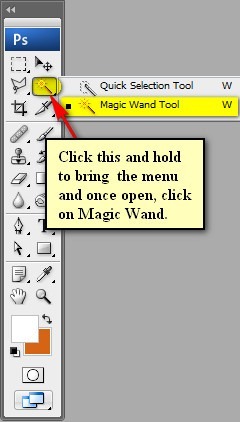
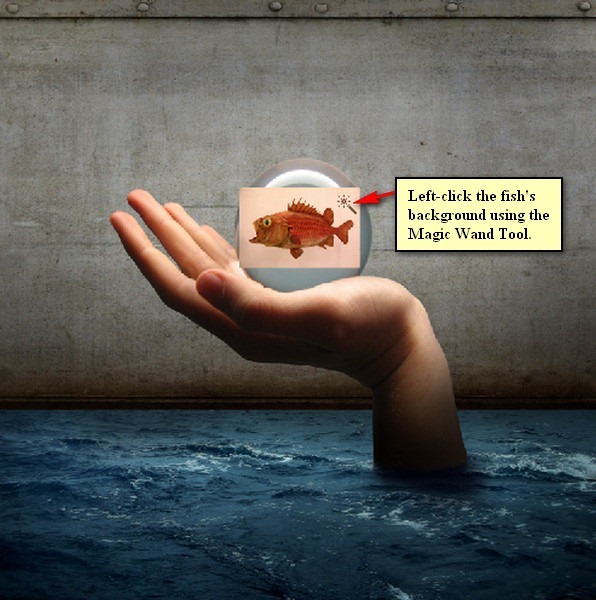
Now, we only need the fish and not its background and to delete this simple background we would need a simple technique as well and that is through the use of the Magic Wand tool (W).
See image below:
Using this Magic Wand tool (W), left-click on the background of the “Fish” layer.
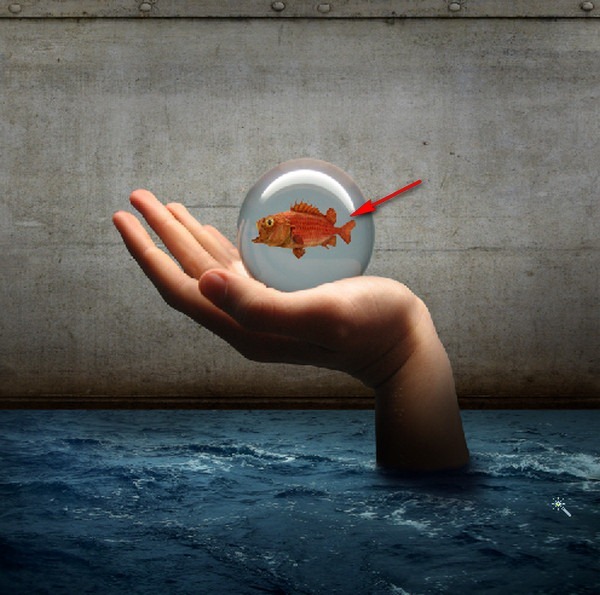
Now that you’ve selected it using this tool, hit Delete on your keyboard and watch the background disappear.
The result:
Now that you’re done, select all the layers that you’ve created in this step and then group them (Ctrl/Cmd + G) and name the group to “Fish”.
Step 6: Create the Water in the Glass
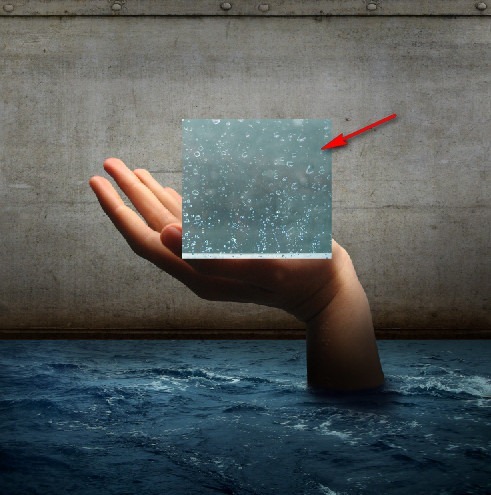
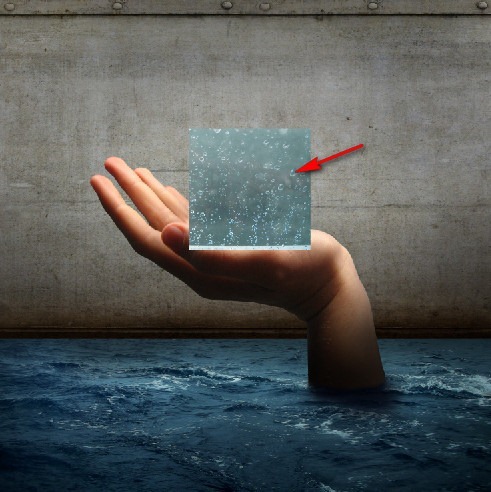
Now we will be adding water in the glass; to do that, open the stock image: “Water on glass I” by deadenddoll stock. Once open, activate the Move tool (V) and drag the whole image to our canvas. Put it on top of the “Fish” group and then rename this layer now to: “Water in Glass”
Position this layer as shown below:
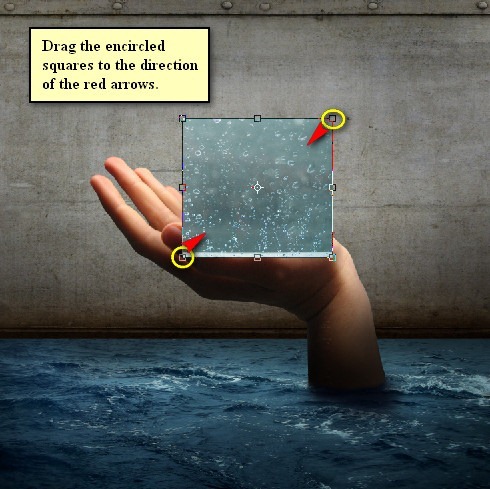
Next, activate the Transform tool (Ctrl/Cmd + T) and then resize the “Water in Glass” as shown below:
The result:
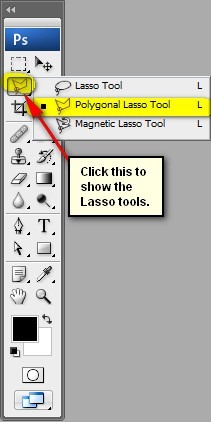
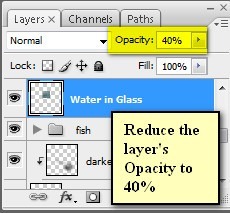
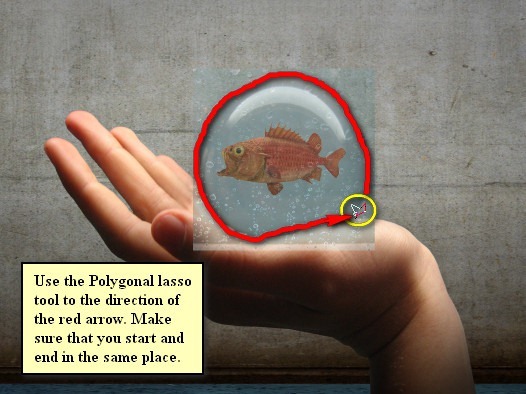
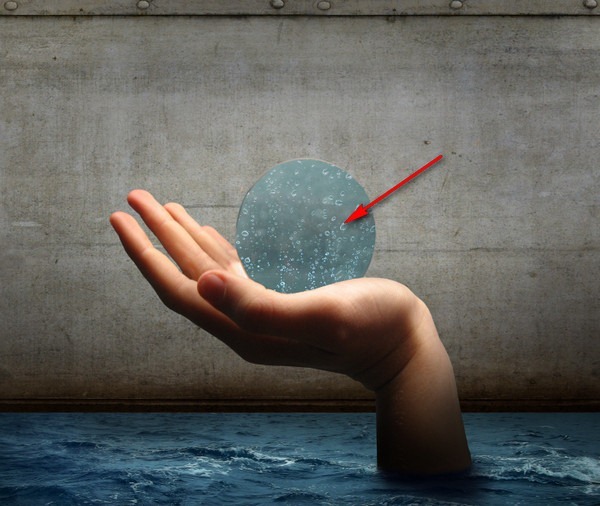
Next, we will cut this square stock image and turn it into a circle, to do that - activate the Polygonal Lasso tool and follow the instructions as shown below:
Once you’ve reduced its opacity you can now use the Polygonal Lasso Tool with ease.
Now, that a selection area is created, press Ctrl/Cmd + J to duplicate that selection and then delete the original layer.
The result will be like this:
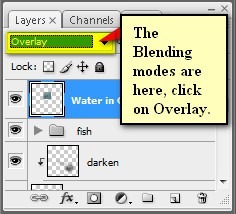
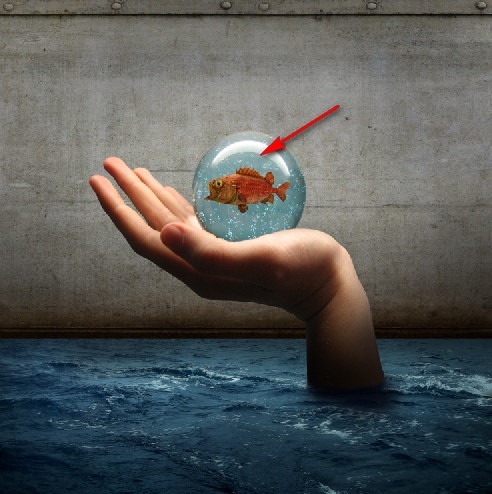
Now, we will change its Blending mode to Overlay to make it look like it is inside the glass ball. To do that, follow the instructions as shown below:
The result of that should be like this:
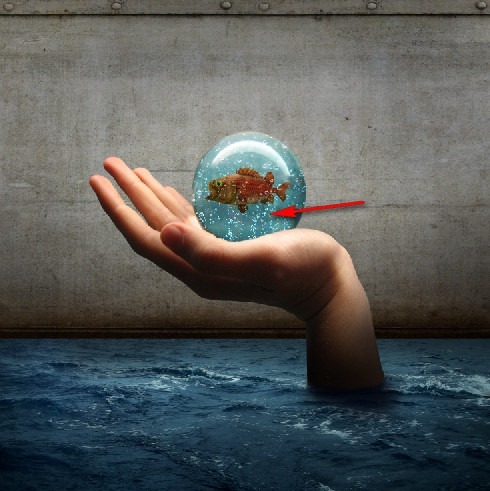
Now duplicate this layer (Ctrl/Cmd + J) and on this duplicated layer, use the following Blending mode and Layer Opacity:
- Blending mode: Hard Light
- Opacity: 100%
The result of that should be similar to this:
Now group these layers (Ctrl/Cmd + G) and name the group to “Water in Glass”.
Step 7: Add the Textures
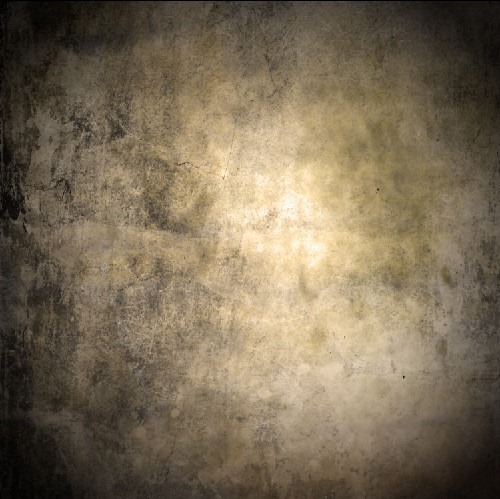
Now, let’s give the image a grungy and dark feel by adding textures. To start, let’s open “grunge” by e dina. Once open, activate the Move tool (V) and drag it to our canvas. Put it on top of all the layers. Position it as shown below:
Once there, change the Blending mode and Opacity to the following:
The result:
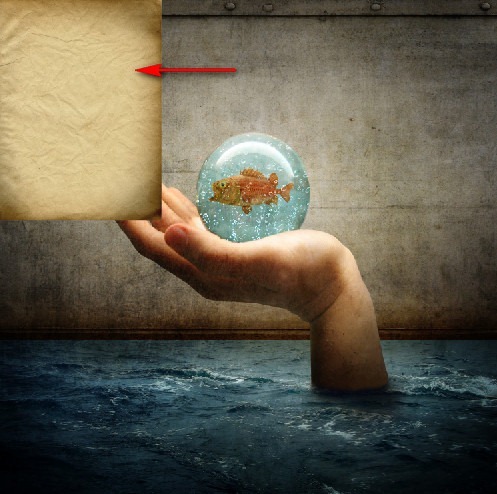
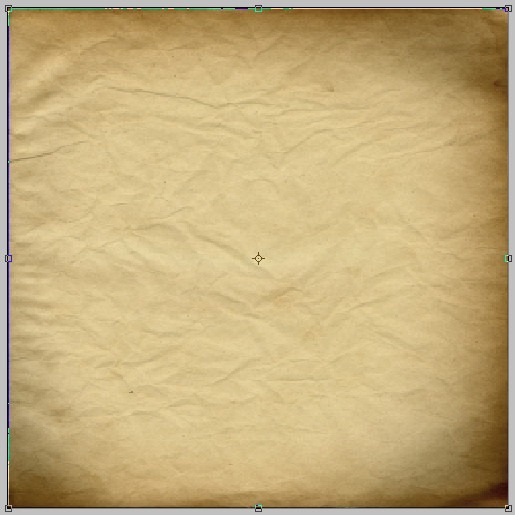
Next, open the texture: “Paper Texture 1” by wojtar stock. Activate the Move tool (V) and drag this image to our canvas. Position it as shown below:
Activate the Transform tool (Ctrl/Cmd + T) and then resize it as shown below:
Now, set the following:
- Blending mode: Soft Light
- Opacity: 40%
The result:
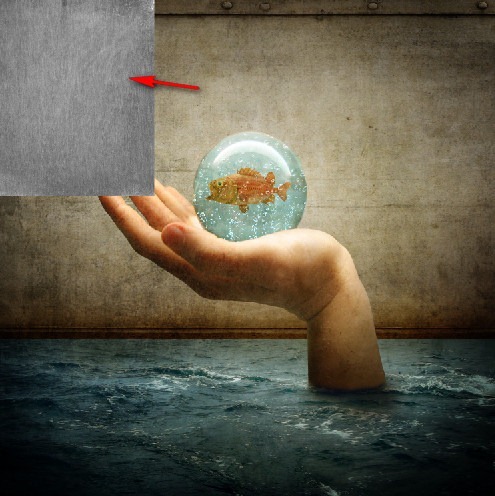
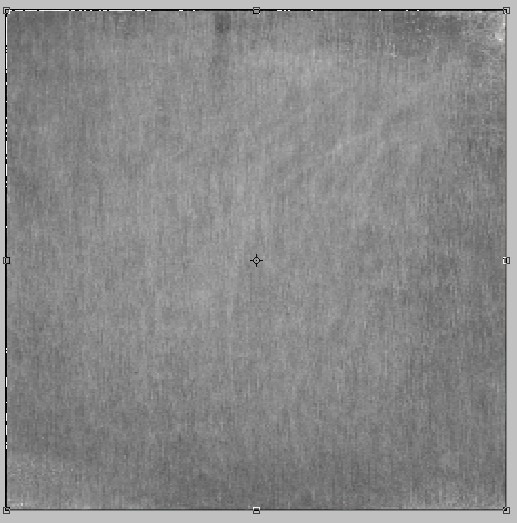
Next, open the texture: “Metal Texture 15” by wojtar stock. Once open, drag it to our canvas using the Move tool (V) and then position it as shown below:
Now, transform (Ctrl/Cmd + T) it as shown below:
Set the following for this texture:
- Blending mode: Multiply
- Opacity: 40%
- Fill: 60%
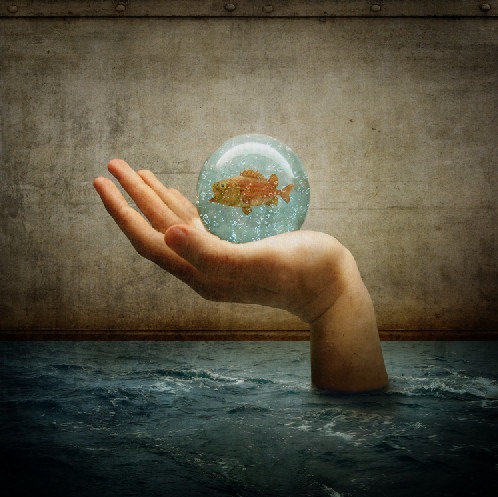
The result:
Click on the “Metal texture 15” layer and duplicate it (Ctrl/Cmd + J). Once duplicated, change the Blending mode and Opacity to the following:
- Blending mode: Soft light
- Opacity: 100%
Now, the result should be similar to this:
Group these layers (Ctrl/Cmd + G) and rename this group to “Textures”.
Step 8: Enhance the Image’s Color
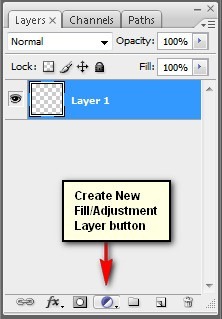
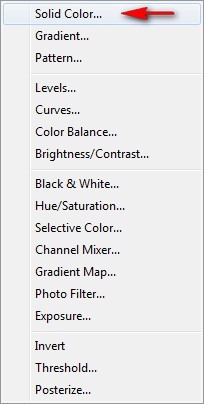
In this step, we will be retouching our image to give it a much more grunge feel. Let’s start by creating a Solid Color adjustment layer which can be found by pressing on the Create New Fill/Adjustment layer button shown on the layer window:
When the Solid Color box opens, input the following:
Then change the Blending mode and Opacity of this layer to the following:
- Blending mode: Exclusion
- Opacity: 50%
Next, create another Solid Color adjustment layer through the Create New Fill/Adjustment layer button. Once the Solid Color box is open, input the following:
Next, change the following:
- Blending mode: Soft Light
- Opacity: 40%
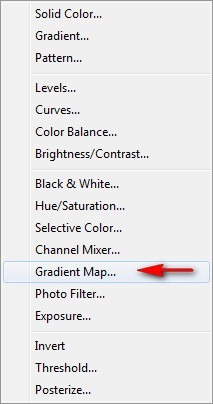
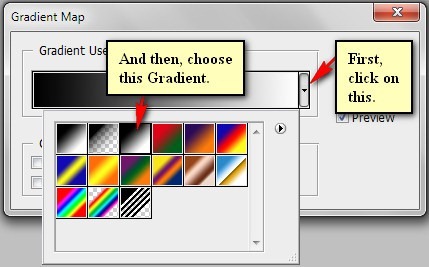
Next, let’s create a Gradient Map adjustment layer from the Create New Fill/Adjustment layer button.
When the Gradient Map box is open, do the following:
Now after hitting OK, you’d notice that your image is now a Black and White image but we don’t want that, so what you should do is change the Opacity to the following:
The result:
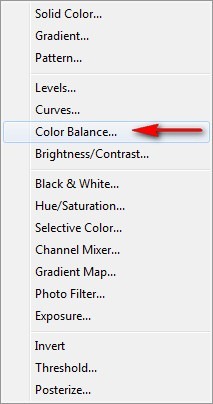
Next, let’s enhance the color; activate the Create New Fill/Adjustment layer button and then choose: Color Balance.
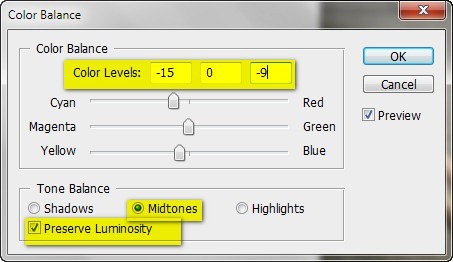
Once open, input the following:
- Color Levels: -15, 0, -9
- Tone Balance: Midtones
- Preserve Luminosity: Checked
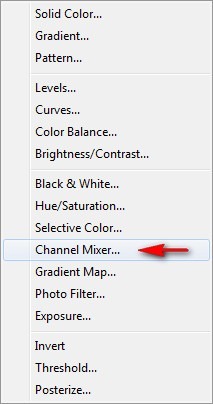
Finally, let’s add a Channel Mixer adjustment layer through the Create New Fill/Adjustment Layer button.
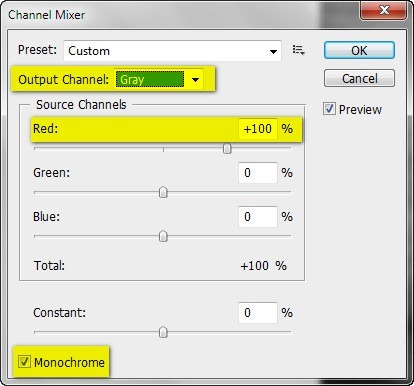
Once open, input the following:
- Output Channel: Gray
- Source Channels:
- Red: +100%
- Green: 0%
- Blue: 0%
- Constant: 0%
- Monochrome: Check
Next, change the Blending mode and Opacity of the Channel Mixer adjustment layer to the following:
- Blending mode: Multiply
- Opacity: 40%
The result of that should be like this:
Download the PSD
How to Create a Disturbing Scene of a Flooded Room with a Giant Hand Carrying a Fish PSD.zip | 189.98 MB
Download from Website
Author’s Comment



Keine Kommentare:
Kommentar veröffentlichen