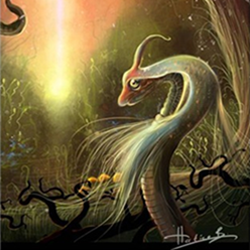
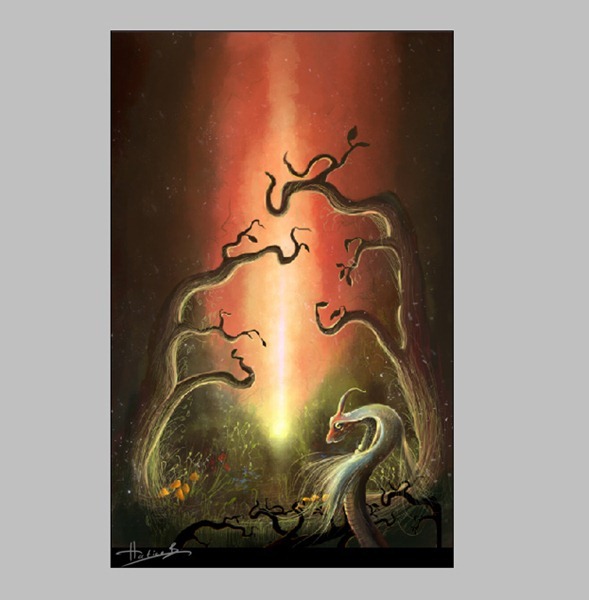
 Learn how to create this fantasy environment painting in Photoshop. This picture represent a fantasy environment painting. I painted it as a personal work and used Photoshop with a Wacom Tablet. You will learn techniques and methods that I personally use for coloring.
Preview of Final Results
How to Create an Environmental Painting Photoshop Tutorial
Part 1 - Drawing
Step 1: Sketching
I often draw a lot of sketch, on computer or maybe sometimes on paper. I decide to paint kind of a fancy environment . First of all I began to see my image in my head but not very colorful. in my imagine I can see this is a vey different planet and in the evening sun is losing in a very different way. And the sky is a different color and the trees in a very different shape too. And I do imagine I'll paint some very alien flowers. Maybe you can say those flowers are alive maybe they can walk or move. Also I would like to draw an alien animal in my sketch
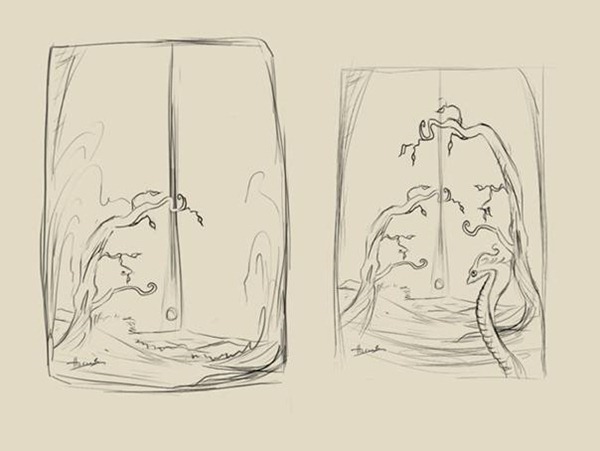
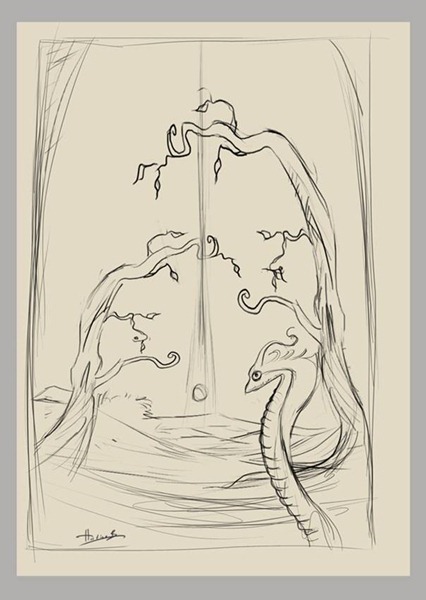
And here are two sketches about my fancy environment. I started with some quick sketches to get a feeling for my environment. I don't go too much into details. I'm just trying to find out how I want environment look like. I n this step I have to make a decision for to continue on painting. I do think I'll use the second sketch. It is looking more dynamic and it has a creature like I want.
For the initial sketch work, Photoshop File size is 668x969. Resolution can be 72 for now. Of course later I need to make it bigger to add painting details. But not now.
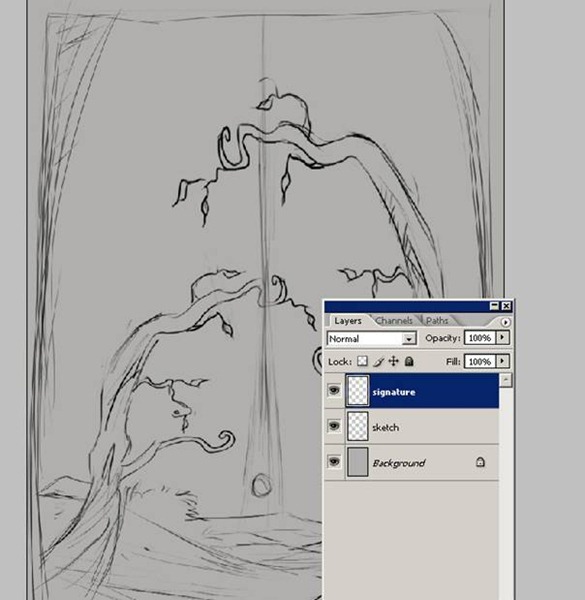
Here is a closer screenshot for the simple sketch work I did with Photoshop. And of course any part of this sketch will be in the final image. You need this sketch entirely for reference purposes.
When I felt my sketch is quite nice I named my new layer name as "sketch" And now here as you see I have 3 layers. You do the same on your project. And now the first layer group is for my signature. You can add a sign your image You have a question in mind - Why so much layer for such simple artwork ? Because if I am not satisfied with the color and want to change I can make some changes via help of those layers. This step is very important.
Step 2: Color Palette
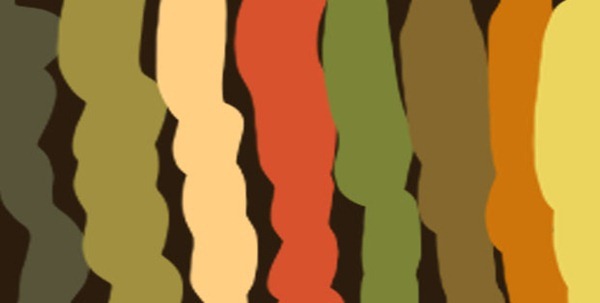
The second thing here you to choose color scheme. I want to do something really colorful colors for the environment . I do think my final colors will be warm colors of autumn. Some orange, green , yellow, red, brown...and so on. I decided for background a dark blue color . Other colors are for the character face and his clothing. Open an another file and save your colors. And always keep open that new file when you are painting.
Step 3: Choosing a Brush
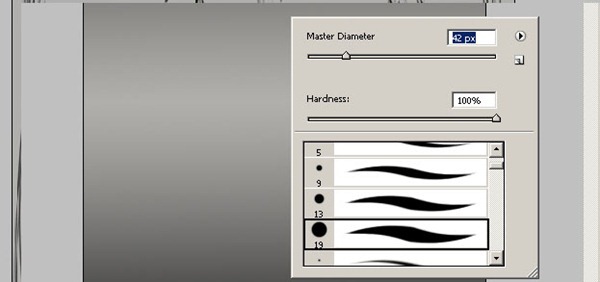
For my environment I am going to use only s standard brushes with some different pen pressure settings. Let me show how I arrange my brush. Chose a simple standard brush
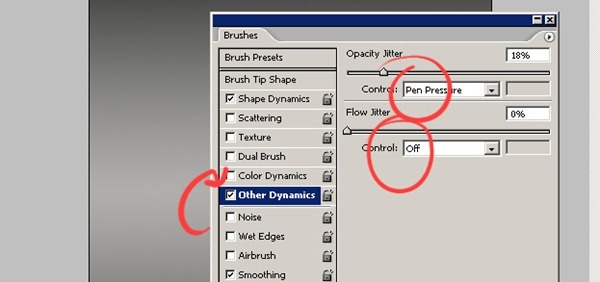
After that from brush panel choose "Other Dynamics" and make the setting as seen on the below picture. And After you click on "Other Dynamics" panel you will see the options. "Control" option is Off.You must change it. Click on the little panel.
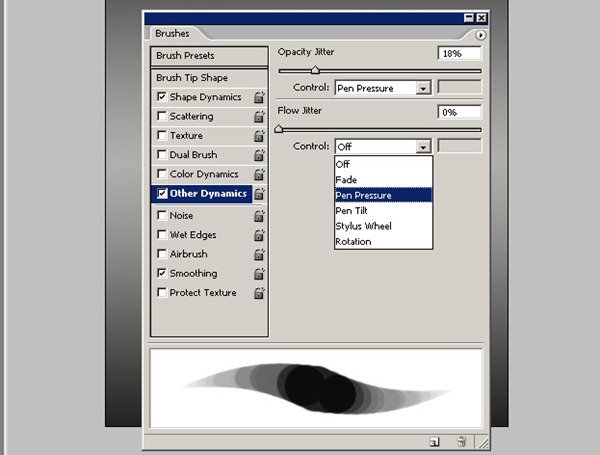
And choose "Pen Pressure" And also you can see the brush at the bottom of the panel.
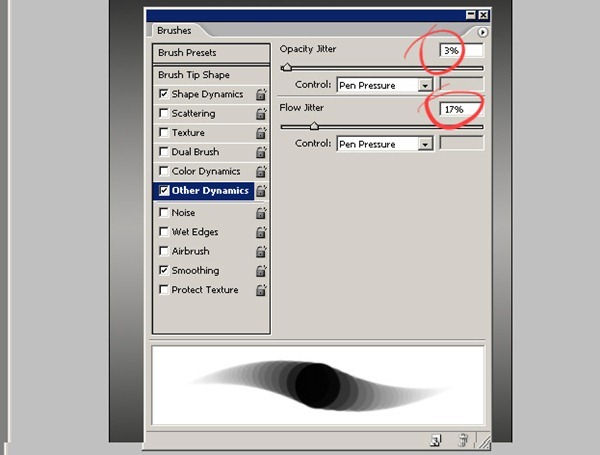
Make the numbers as seen. From the bottom of the panel you must have noticed how different strokes it has now.
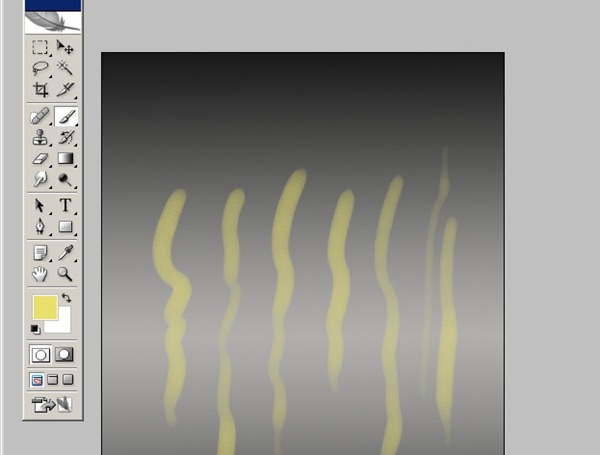
Now try your brush. See how soft it is and make some strokes with your new brush settings and try too see how it is painting. You see the soft strokes of the brush and nothing too fancy about brushes since some of you wondered.
How to Create an Environmental Painting Photoshop Tutorial
Part 2 - Coloring the Sketch
Step 1: Working On The Background
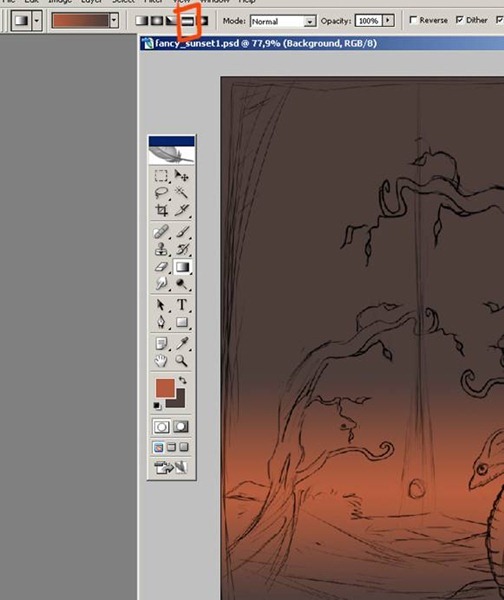
At this point, we can start coloring the sketch work. Don't focus in on any one area, just start throwing down some shading to bring the volumes out. At this stage I just start coloring and give the basic background colors to the sketch. Select the Gradient Tool and do as you see on the picture.
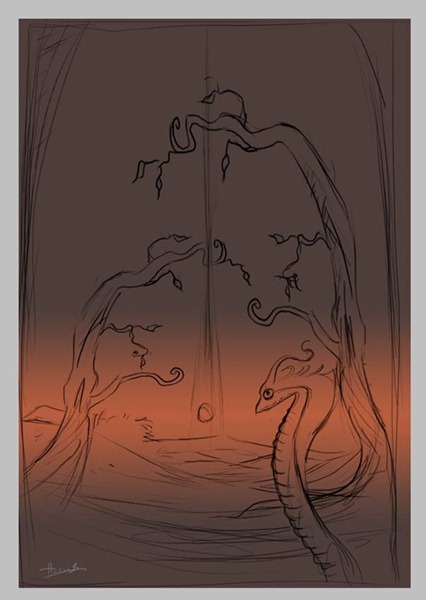
After you filled the background, it must be like this. Red area is for the sun and upper image is going to be more darky and more reddish colors. Also there will be some green colors on the background. But we are going to add those colors later.
Step 2: Coloring
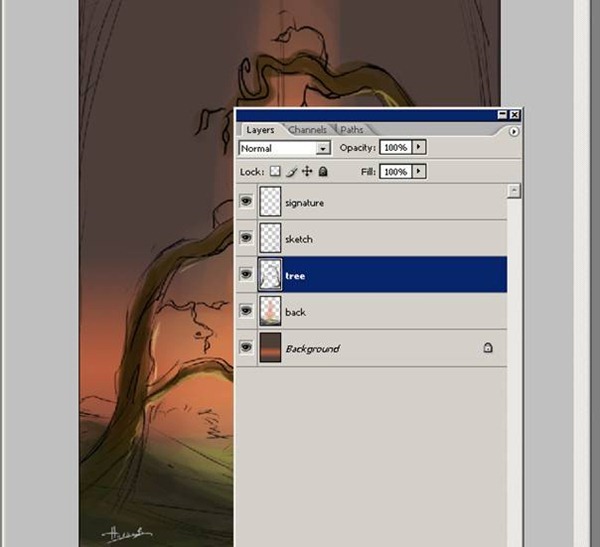
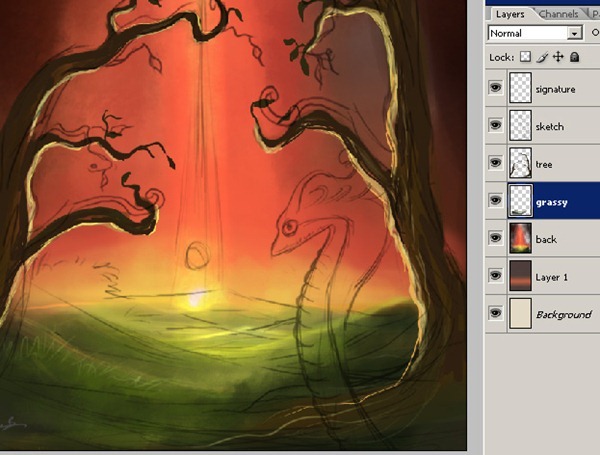
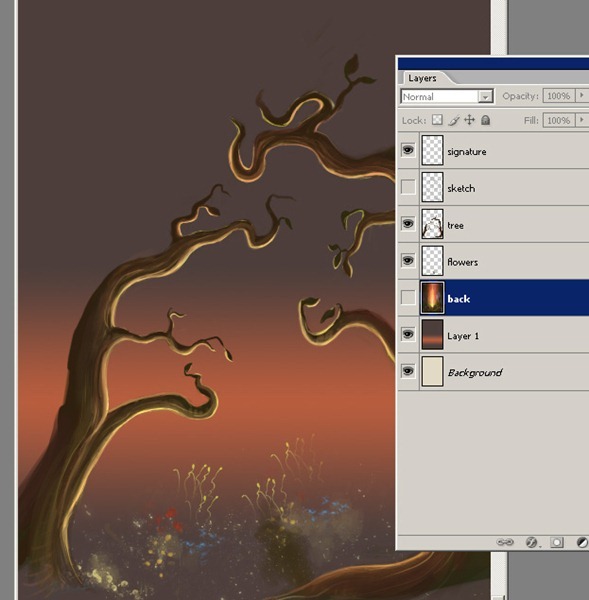
Before continue the painting process let me sow you my layer order. Here are my layers for the image. "tree" layer is for the tree color. And the "back" layer is for the background layer. Others is for the main sketch and the signature. So as you see I have opened a new layer for tree and the background. You can change the name of the layers if you want. For to change please click twice on the layer and write here name of the layer .
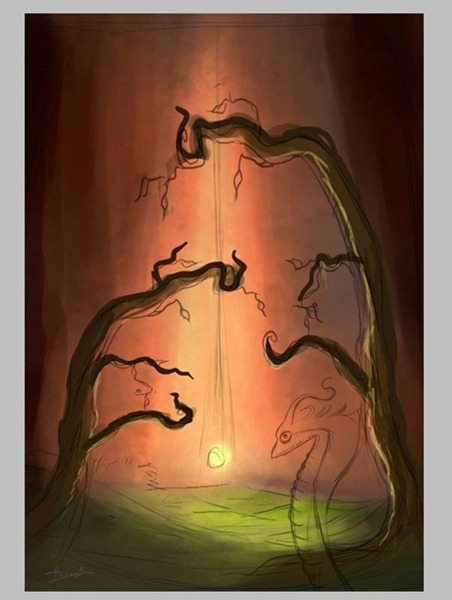
Now here as you see I am coloring the tree and the sun and painting at the top of the image with a dark brown and some dark red colors. I'm sure you have noticed I haven't painted the alien character. I'm not painting this character at this step. I'm going to began coloring this character at the next part.
At this step I have opened a new layer with the name of "grassy" it is for the background of the greenish area. I paint dark colors at the bottom of the trees and with yellow color I paint area of the sun. At the next step I'm going to paint some nice green flowers and some tiny dots for to represent imaginary flowers and green grass.
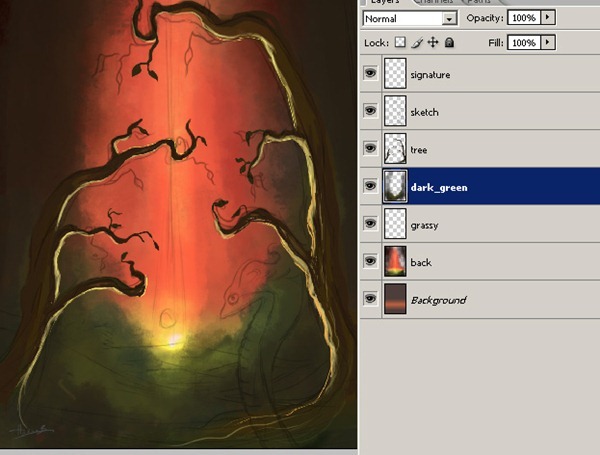
Now I paint more dark areas on a new layer . Name of the new layer is "dark_green " as you see.
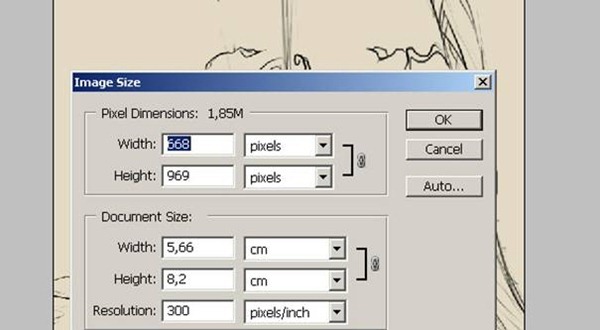
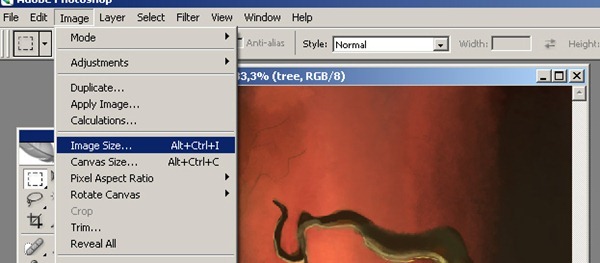
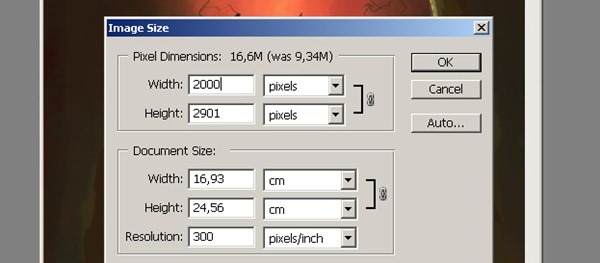
And at this step I would like to change the size of my file because I'll begin to add more details so I need a bigger file size. I do wish my file is to be more bigger size because at this stage I do think I can't make so much detailed painting. So I open Image/Image Size.
And make the settings as you see.
Step 3: Quick Detailing
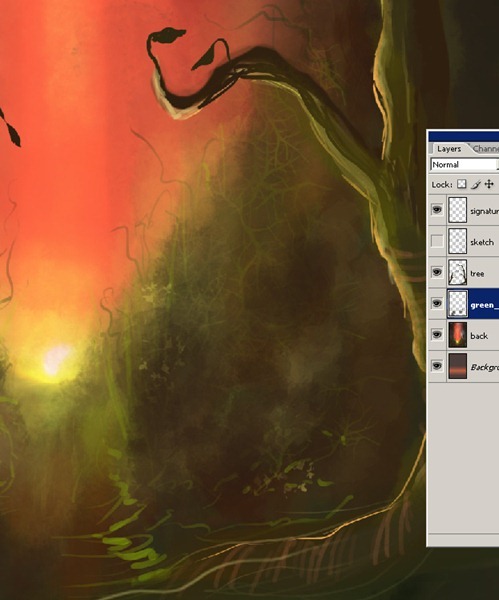
Now I can continue to painting with this bigger file size. I'm more more comparable on painting. I continue to paint more green grass. On the top of my "back" layer there is a new layer as you see. I have merged the other layers together "back"layer. So now you see it is going to be more easy to paint with less layers. I paint some green grass and some darky areas on the ground.
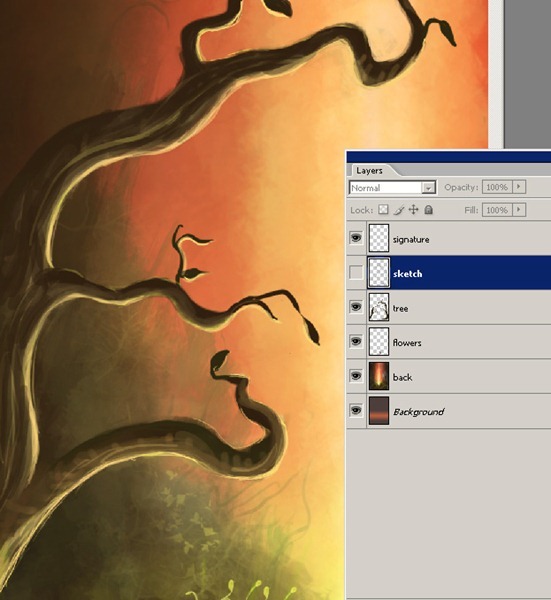
I also hide the "sketch" layer for you to see more details about the tree.
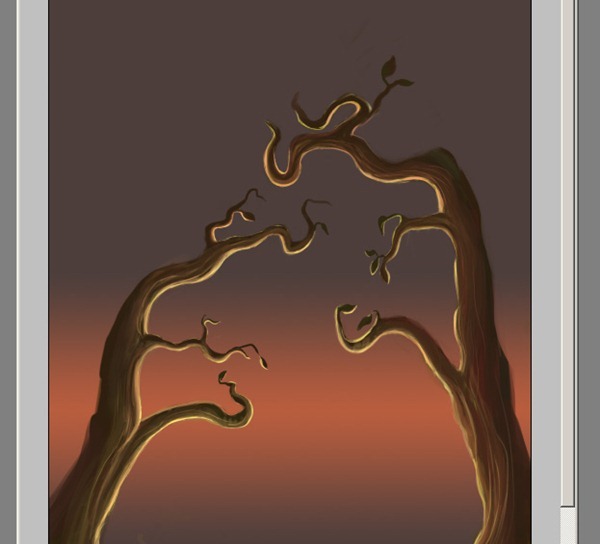
Now I'm going to hide hide the "back" layer too. Look at the outline of the tree. At the next step I am adding more detailing to the tree branches and the leaves.
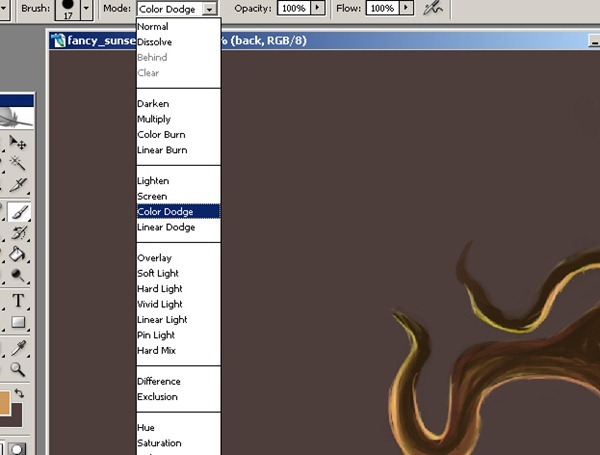
And also I do add some strokes with the Dodge tool too. I use this because I want to add some slight light areas on the tree.
When I do want to add some more light on the tree I am going to use color dodge tool. When you are using this option you must be very careful not to press hard on the pen of your table. With your pen tool you must very lightly touch on the tree branches. Don't use hard strokes.
Now look at all details which I just make with the color dodge option.
Step 4: Main Detailing
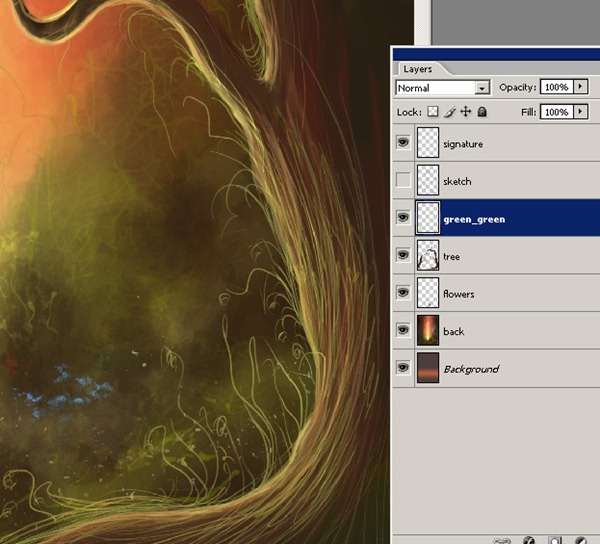
Once I'm satisfied with detailing the tree I create a new layer and name it with "green_green" I continue to add some green grass. Then I opened all layers except "sketch" layer.
Step 5: Changing Canvas Size
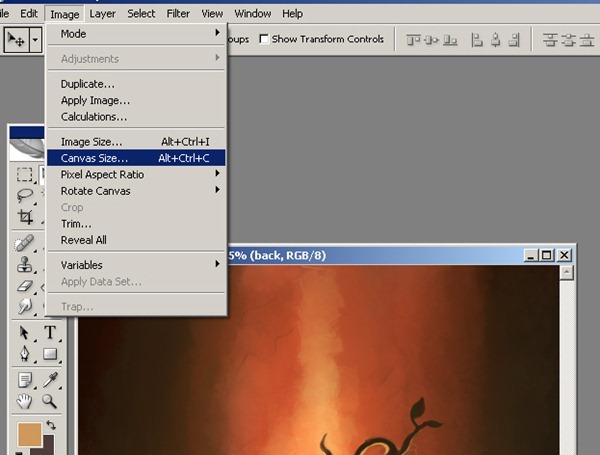
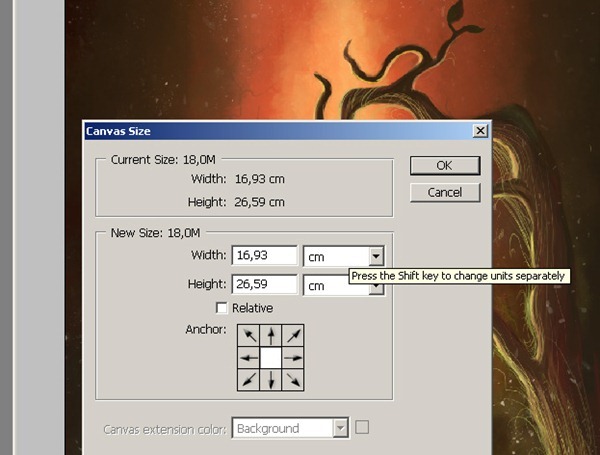
I do think I must make a little change with the canvas size so from Image select Canvas Size.
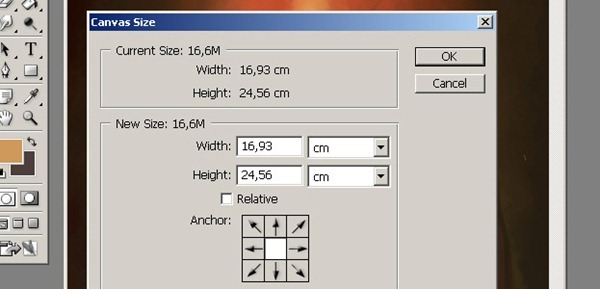
Here are my first settings before I change. I do want make higher the Height Size.
Here make the settings as you see.
Step 6: Continue add more Detailing
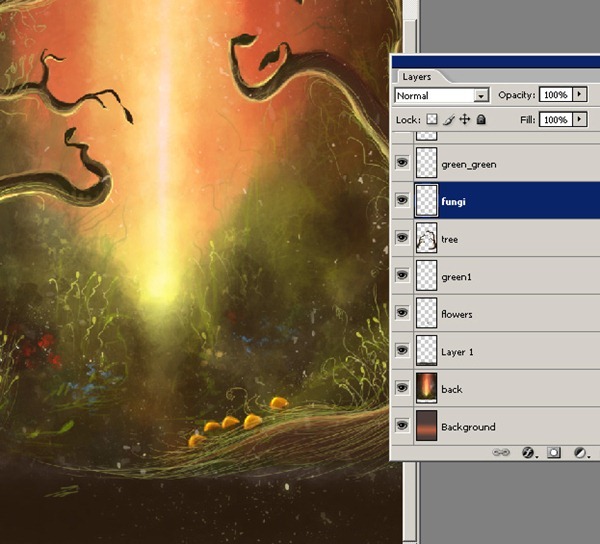
I continue to add more details and opening some new layers when I need. Pay attention to my layer order. And also pay attention to blank area at the bottom. We will need this area later.
Step 7: Working on Character
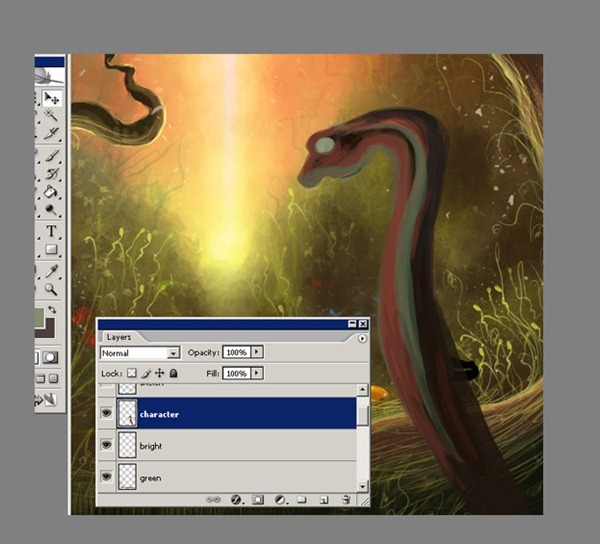
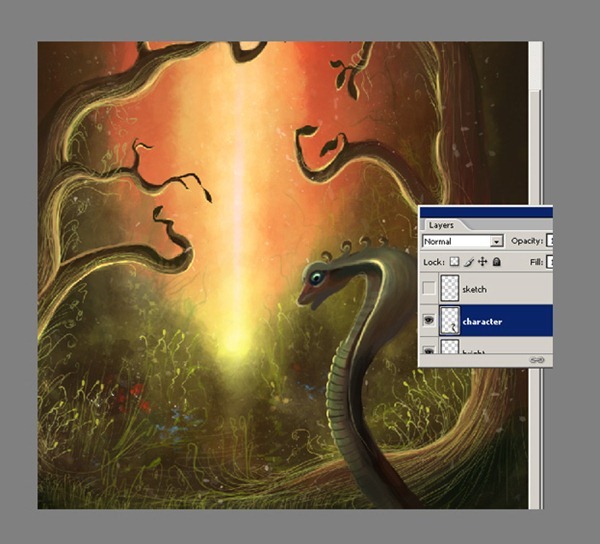
Now that I have decided to paint alien animal character. At the step I am just trying with the basic colors for my sketch. I have just closed the sketch layer for the see how is looking my character painting. I can start to add details. In this step. I started with coloring of my character. First select the "character" layer and began begin adding the character's colors.
I'll now begin to detail the character, adding more yellow and green colors. By the way don't forget at this step you don't have to over detail everything. At this point I kept working on main details and lights, until I got a nice and contrast. Sometimes I have to change some colors. I am pretty much finished with painting it's body.
Step 8: Detailing Character
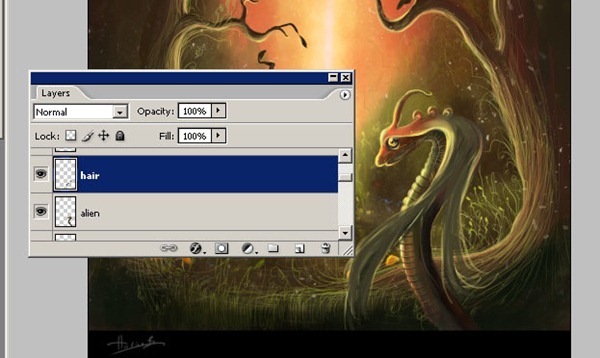
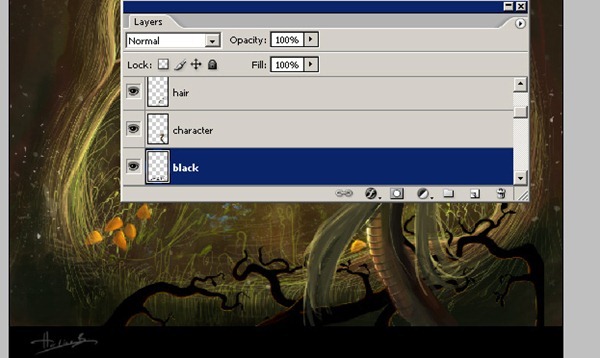
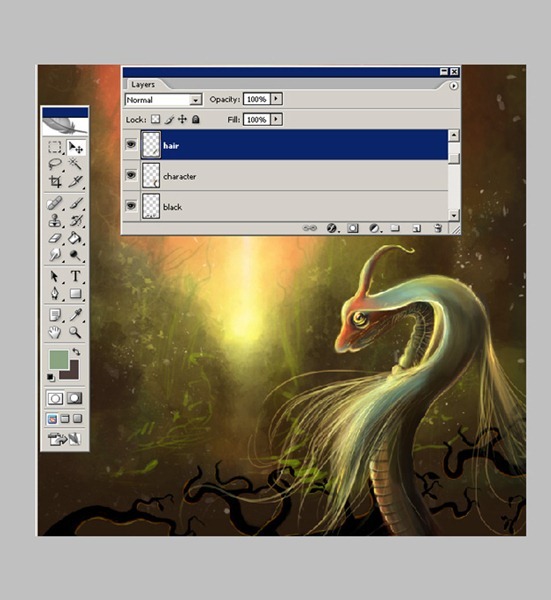
At this point I realized that my first character sketch is looking very simple and not so good, so I thought it was time to make some changes about character . I try some different outlook for it. First I have opened a new layer as "hair" and I continue to adding more details. I also would like to add some more details at the bottom of the image.
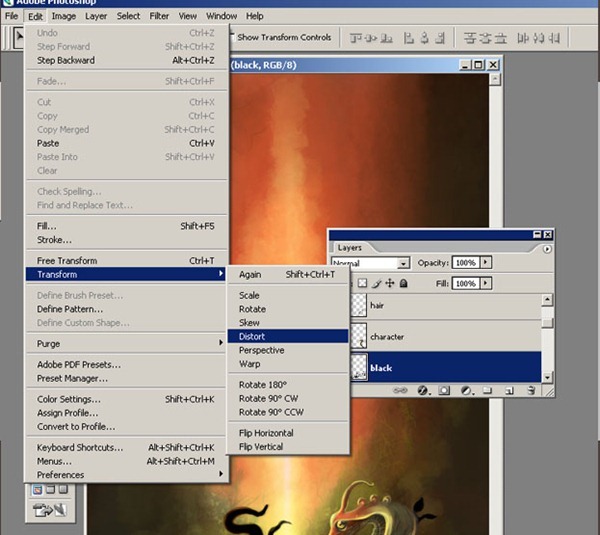
I do want some details at the bottom of our illustration. So first I have make a copy of the "tree" layer and name it as "black" And after choose Edit/Transform/Distort.
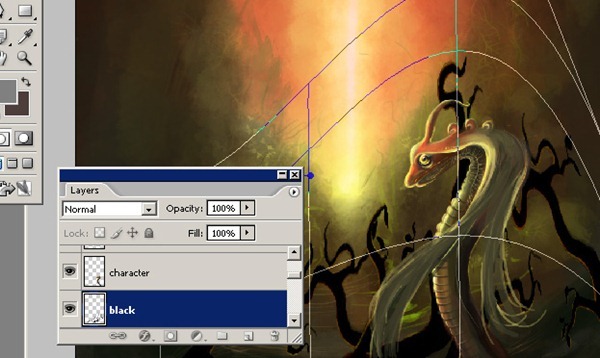
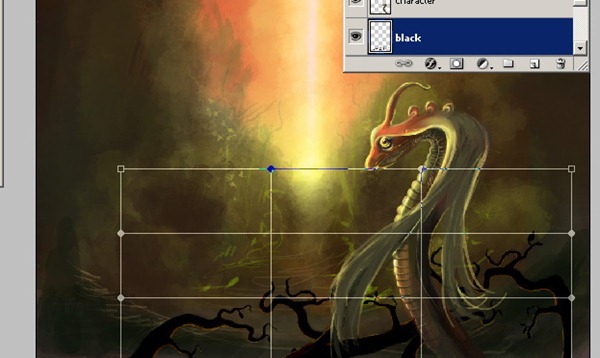
And make some changes with that. After from the sample panel select the Warp option and some changes as I did with the tree layer.
Here as you see position of the black tree must be like this.
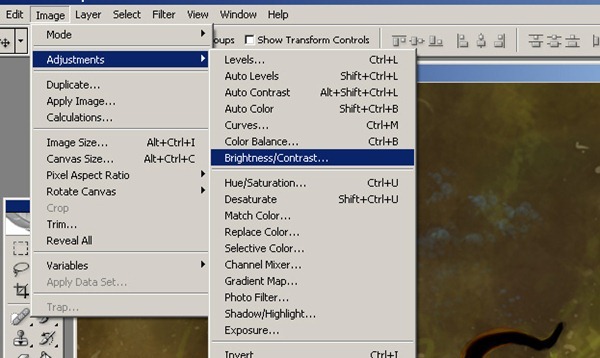
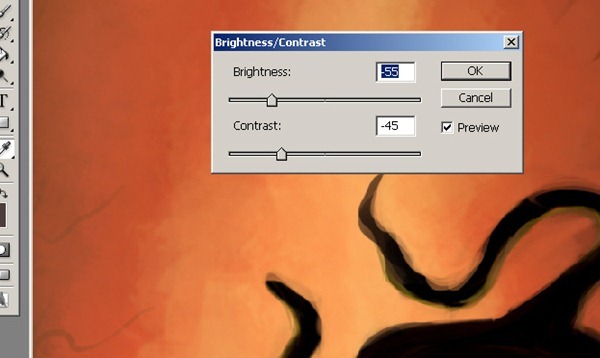
Now at this step you must have noticed my new tree's color is black. Before I make those changes I had changed it's color via help of the Brightness Contrast. If you haven't changed it now you can arrange it. Here let me show how I did. Select Image/Brightness/Contrast
And make the settings as you see. Now we have completed this stage.
Now we can start out detailing our character. I also used Color Dodge tool for the bright areas. This is how it looks once all the adjustments are done with the Color Dodge and Burn tool.
Step 9: Final Adjustment
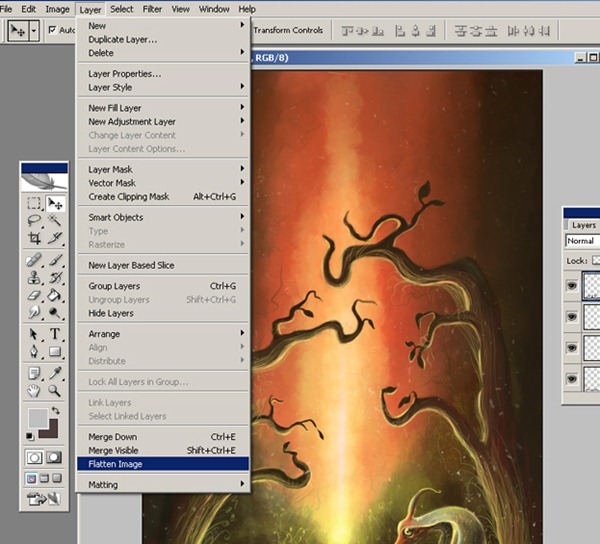
At this last step I use Photoshop's color balance tool to change colors a little bit. First of from Layer option select Flatten Image.
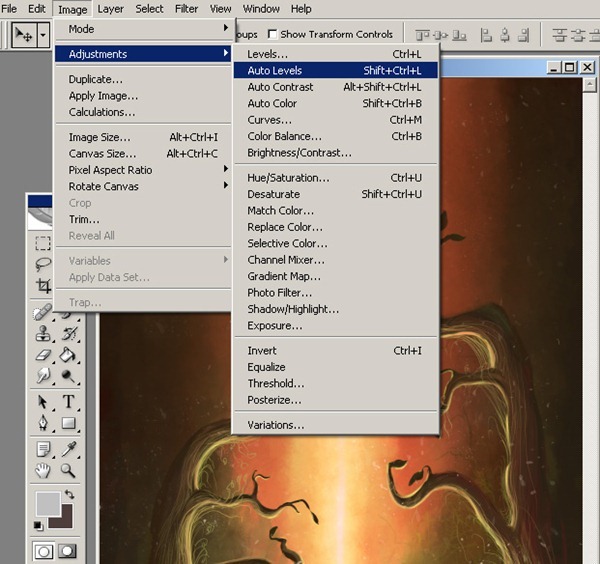
After flatten image, select Image option and Auto Levels. Now we are going to make some changes about colors.
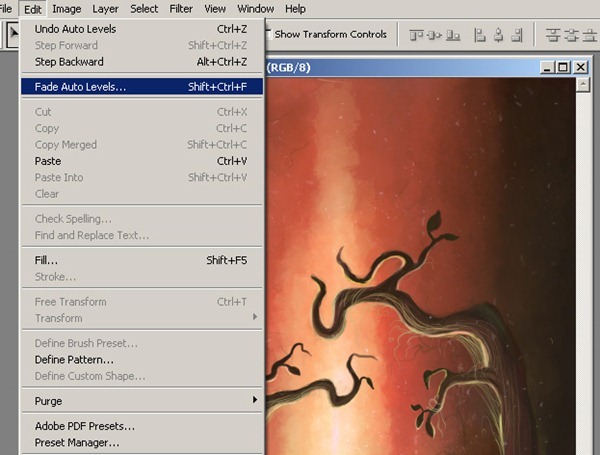
After making Auto Levels your picture will be very lighted so you need to fade a little the brightness. Select the Fade option as you see.
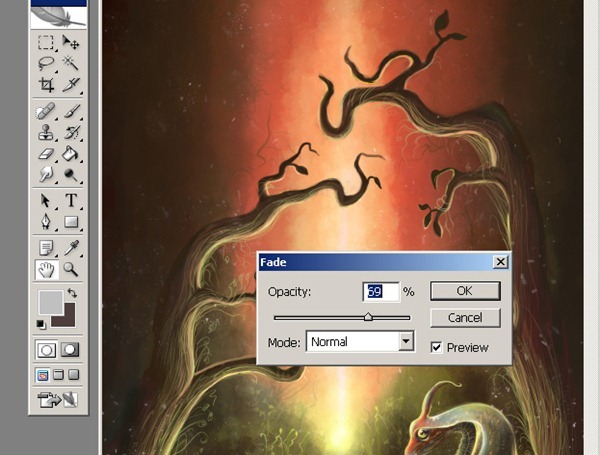
And make the settings as you see..
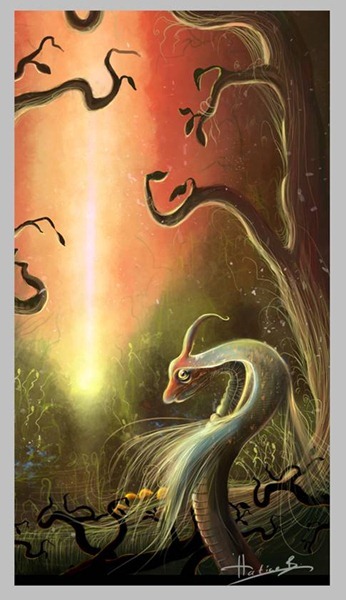
And here's the final image, I hope you found this Tutorial interesting. Thank you for reading.


![image024[1] image024[1]](http://photoshoptutorials.ws/images/stories/c37a0b60858a_5F67/image0241.jpg)
Keine Kommentare:
Kommentar veröffentlichen